

911Time
Suzuka
- Joined
- 25 Sep 2018
- Messages
- 1,172
Hi all,
After being 'eaten' by the car one too many times recently, whilst trying to retrieve things from the boot, I've finally gotten around to fitting new gas struts to the bonnet - like I did previously for the engine cover.
Replacement is very simple, can be done with the minimum of tools and doesn't require any engineering know-how - it's an easy fix, that can save a trip to the garage and a few ££s at the same time.
Changing the struts is pretty much the same as my previous post for the engine cover but to make searches more productive, I thought I'd post a 'How to', specifically for replacing the bonnet gas struts.
The OEM struts are made by Stabilus - Part No: 991 511 551 00
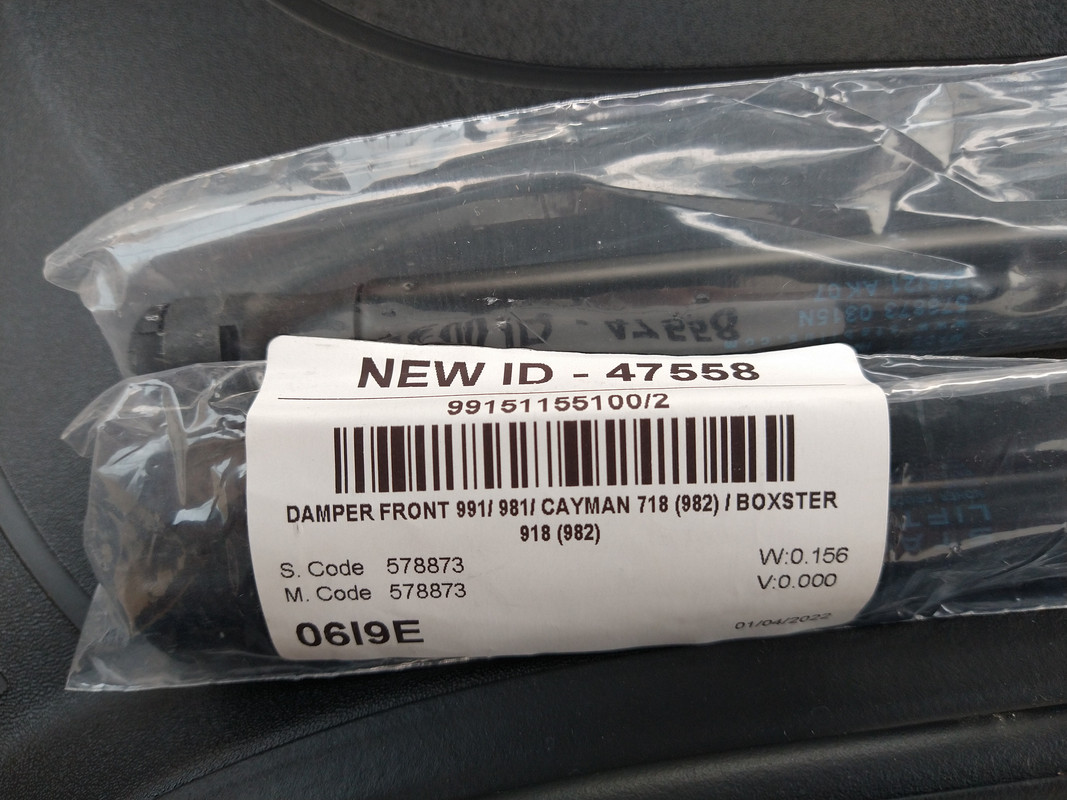
Purchased again from Design 911 at £20.95ea x 2
https://www.design911shop.com/Stabi...MIxvTQq9St-QIVweh3Ch1EBQQUEAQYASABEgJOnfD_BwE
Tools
Small flat bladed screwdriver, large flat bladed screwdriver, some kitchen roll, a couple of cloths, a length of wood/broom handle etc.
Difficulty
Novice - as easy as it comes.
Here we go
1: Open the bonnet.
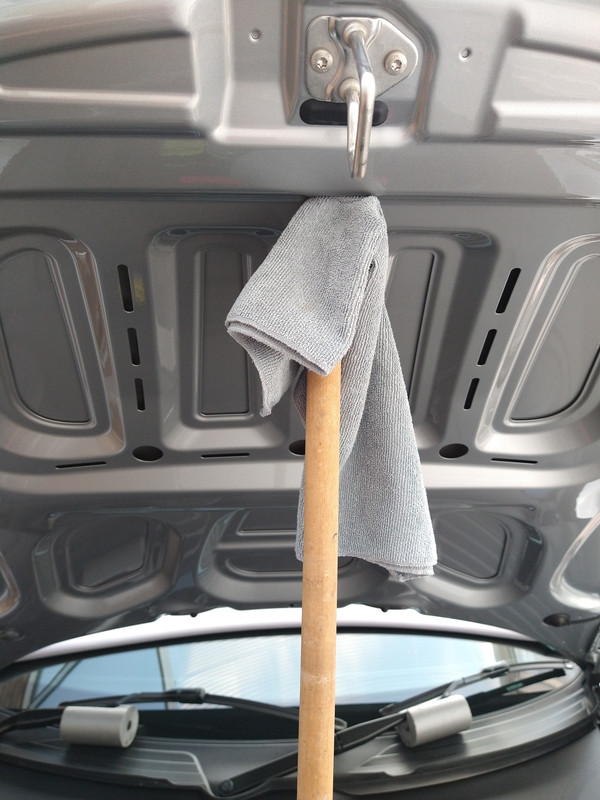
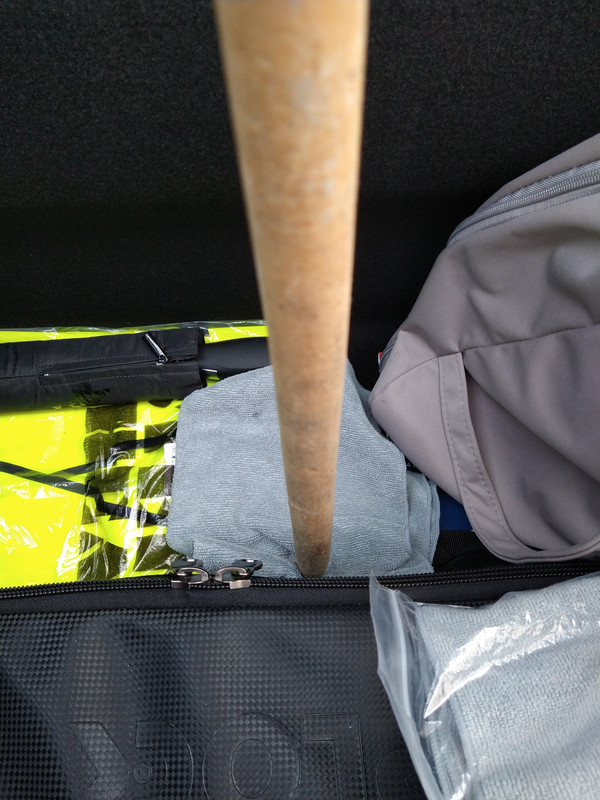
2: Carefully place a length of wood/broom handle or similar, between the boot floor and the underside of the bonnet (protecting the underside of the bonnet with some thick cloths). You'll need a length of wood that's long enough to hold the bonnet in its fully open position, or a helper to hold it because a) if the two old struts won't hold the bonnet open, removing them one at a time with no other means of support, will definitely bring the bonnet down on your head, b) the struts need to be fitted, with the bonnet in its fully open position.
IMPORTANT: The bonnet is aluminium and could easily be damaged, so take great care how you position the wooden support!!
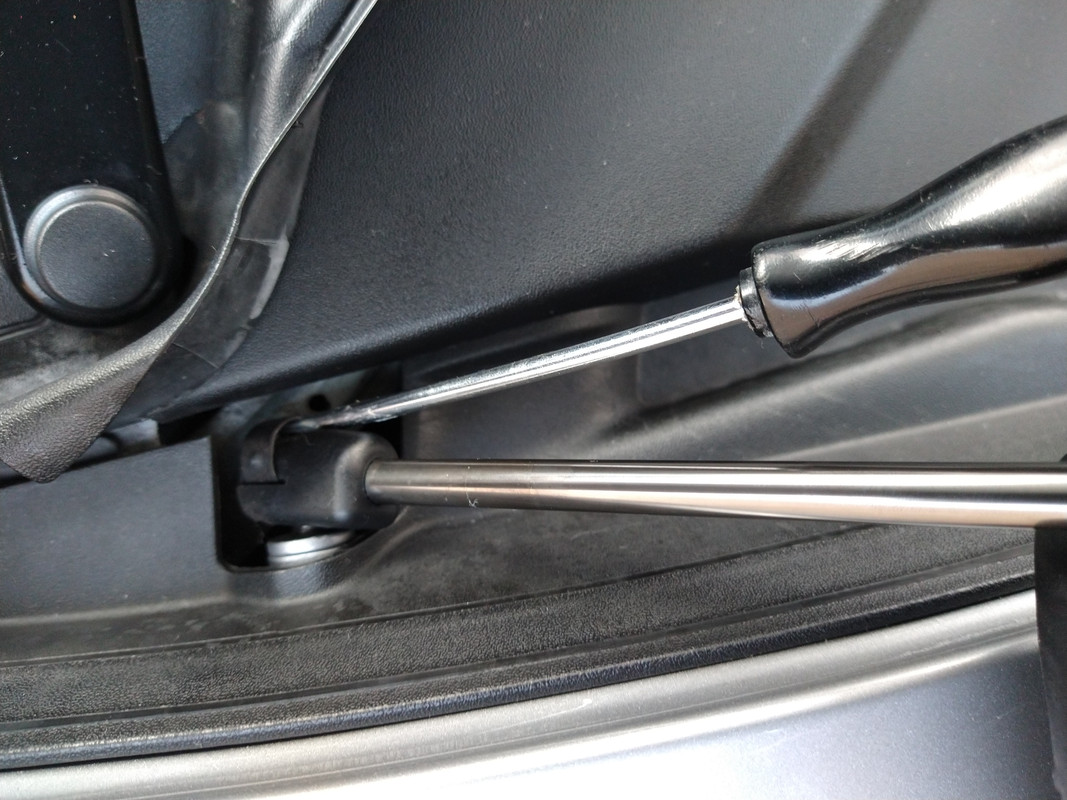
3: The gas struts are held in place by ball & socket type fixings at either end, which have a metal clip that holds the ball in the socket. The clips must be prized out slightly, to enable you to remove the plastic socket, from the metal ball (on the bonnet). You could just yank them off but why damage the car for the sake of a few more seconds?
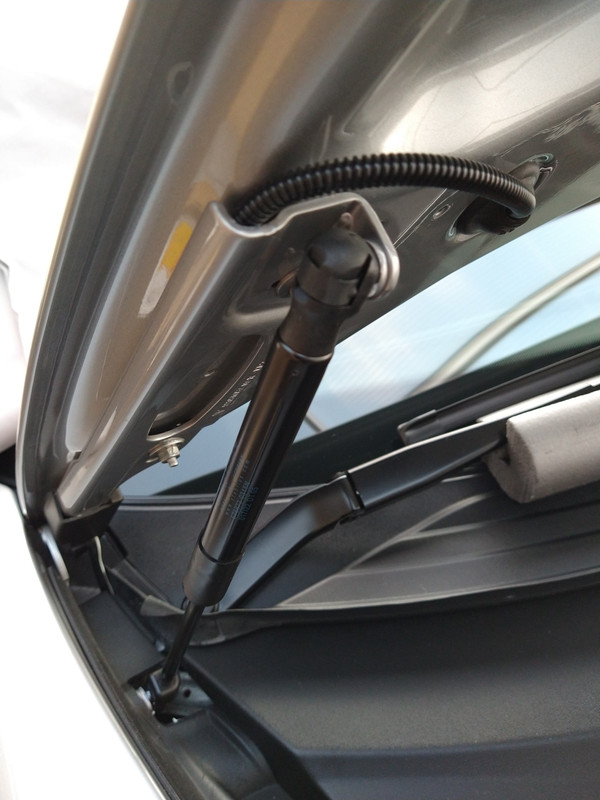
4: Insert the end of the small screwdriver beneath the edge of the metal clip on the upper end of the strut and lever it up, against the plastic, in order to lift the clip out of the plastic. Once the clip's moved out slightly, you can use the large screwdriver to lift it further if needed.
You don't need it to come out completely, just lifted away from the plastic head.

5: With the screwdriver holding the clip out on the upper socket, you can now use your hand to pull the gas strut, away from the upper ball. Remove your screwdriver and let the strut lay down gently on the plastic boot surround.
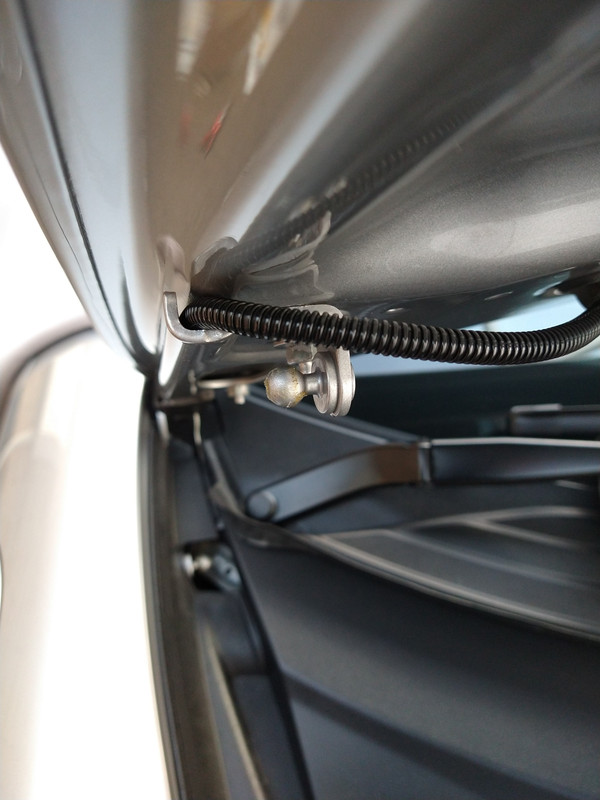
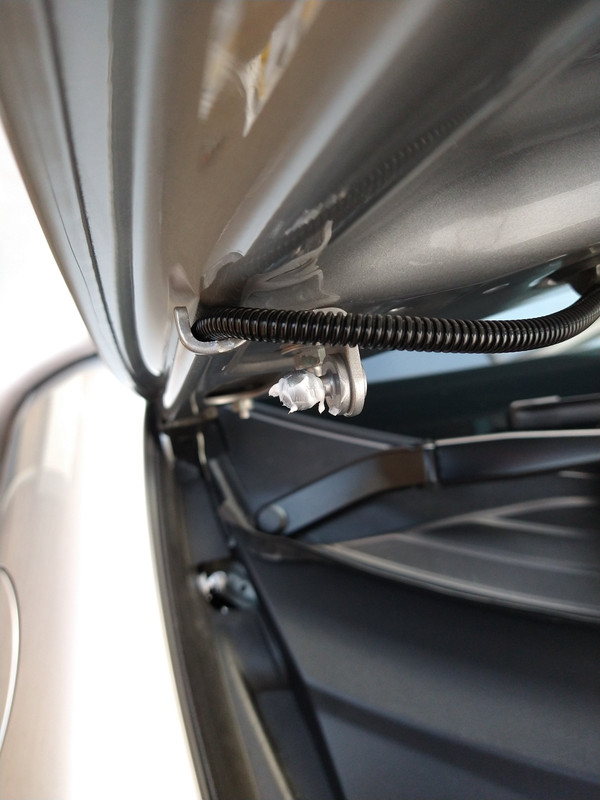
6: Repeat this procedure for the lower ball & socket - again using your hand to push the socket off the ball. You can do this with the plastic battery cover in place but may choose to remove it for easier access.
7: Having removed the first struts, you can clean any dirt/old grease from the ball ends with some kitchen paper or lint-free cloth.
8: The new parts usually come with a small amount of grease inside the ends but here I've added a little Teflon grease.
9: Noting from the other (existing part) which end is up and down, tease out the metal clips a little on the lower socket, ready to fit it.
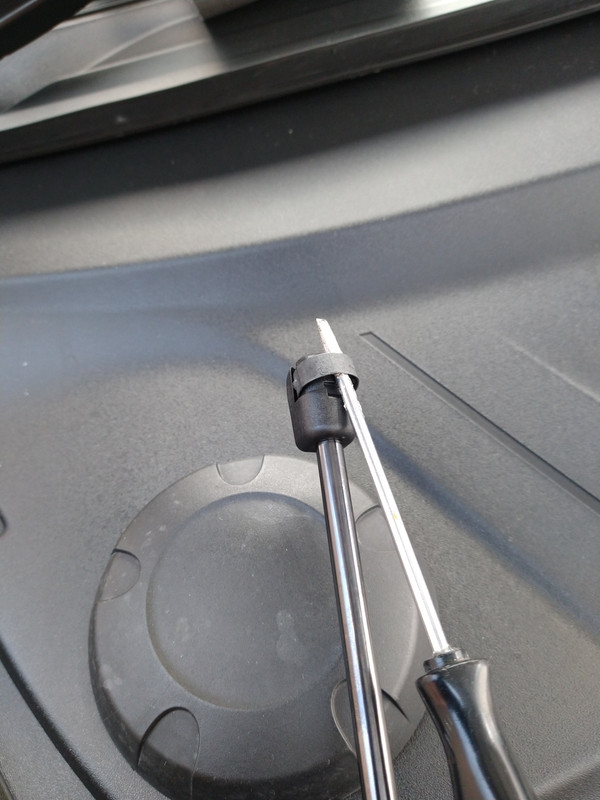
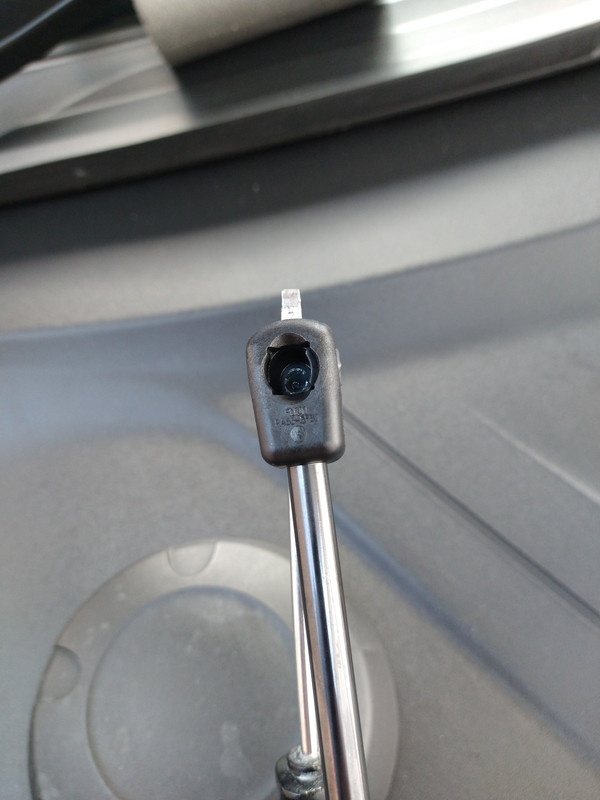
This image shows how the metal clip looks in its retracted position.
10: With the clip held out on the lower socket, pull it onto the metal ball before withdrawing the screwdriver and pressing the clip firmly into place.
11: Repeat this with the upper socket and then repeat the whole procedure on the other side.
12: Finally replace the plastic battery cover (if removed) and carefully remove the wooden stay.
Job done. You can now enjoy the 'whoosh' sound, as your new gas struts power the bonnet open and not have to worry about lumps on the head :lol:
Hope that helps.
After being 'eaten' by the car one too many times recently, whilst trying to retrieve things from the boot, I've finally gotten around to fitting new gas struts to the bonnet - like I did previously for the engine cover.
Replacement is very simple, can be done with the minimum of tools and doesn't require any engineering know-how - it's an easy fix, that can save a trip to the garage and a few ££s at the same time.
Changing the struts is pretty much the same as my previous post for the engine cover but to make searches more productive, I thought I'd post a 'How to', specifically for replacing the bonnet gas struts.
The OEM struts are made by Stabilus - Part No: 991 511 551 00
Purchased again from Design 911 at £20.95ea x 2
https://www.design911shop.com/Stabi...MIxvTQq9St-QIVweh3Ch1EBQQUEAQYASABEgJOnfD_BwE
Tools
Small flat bladed screwdriver, large flat bladed screwdriver, some kitchen roll, a couple of cloths, a length of wood/broom handle etc.
Difficulty
Novice - as easy as it comes.
Here we go
1: Open the bonnet.
2: Carefully place a length of wood/broom handle or similar, between the boot floor and the underside of the bonnet (protecting the underside of the bonnet with some thick cloths). You'll need a length of wood that's long enough to hold the bonnet in its fully open position, or a helper to hold it because a) if the two old struts won't hold the bonnet open, removing them one at a time with no other means of support, will definitely bring the bonnet down on your head, b) the struts need to be fitted, with the bonnet in its fully open position.
IMPORTANT: The bonnet is aluminium and could easily be damaged, so take great care how you position the wooden support!!
3: The gas struts are held in place by ball & socket type fixings at either end, which have a metal clip that holds the ball in the socket. The clips must be prized out slightly, to enable you to remove the plastic socket, from the metal ball (on the bonnet). You could just yank them off but why damage the car for the sake of a few more seconds?
4: Insert the end of the small screwdriver beneath the edge of the metal clip on the upper end of the strut and lever it up, against the plastic, in order to lift the clip out of the plastic. Once the clip's moved out slightly, you can use the large screwdriver to lift it further if needed.
You don't need it to come out completely, just lifted away from the plastic head.
5: With the screwdriver holding the clip out on the upper socket, you can now use your hand to pull the gas strut, away from the upper ball. Remove your screwdriver and let the strut lay down gently on the plastic boot surround.
6: Repeat this procedure for the lower ball & socket - again using your hand to push the socket off the ball. You can do this with the plastic battery cover in place but may choose to remove it for easier access.
7: Having removed the first struts, you can clean any dirt/old grease from the ball ends with some kitchen paper or lint-free cloth.
8: The new parts usually come with a small amount of grease inside the ends but here I've added a little Teflon grease.
9: Noting from the other (existing part) which end is up and down, tease out the metal clips a little on the lower socket, ready to fit it.
This image shows how the metal clip looks in its retracted position.
10: With the clip held out on the lower socket, pull it onto the metal ball before withdrawing the screwdriver and pressing the clip firmly into place.
11: Repeat this with the upper socket and then repeat the whole procedure on the other side.
12: Finally replace the plastic battery cover (if removed) and carefully remove the wooden stay.
Job done. You can now enjoy the 'whoosh' sound, as your new gas struts power the bonnet open and not have to worry about lumps on the head :lol:
Hope that helps.


")


