Porsche 911 UK Enthusiasts Online Community Discussion Forum GB

Welcome to the @Porsche911UK website. Register a free account today to become a member! Sign up is quick and easy, then you can view, participate in topics and posts across the site that covers all things Porsche.

Already registered and looking to recovery your account, select 'login in' and then the 'forget your password' option.

Rob's '99 Carrera 4 Cabriolet

ConradBuff

Trainee
Joined
5 Mar 2021
Messages
74
Hi all. Have owned many cars over the years, mostly VW's but have never started a 'build' thread. This being my first Porsche I thought I'd make the effort to document everything through my ownership.

I bought the car at the end of September last year so I have some catching up to do! Apologies if its a bit of dump to start with, I'll try and use this space to document the changes and upgrades I make going forward.

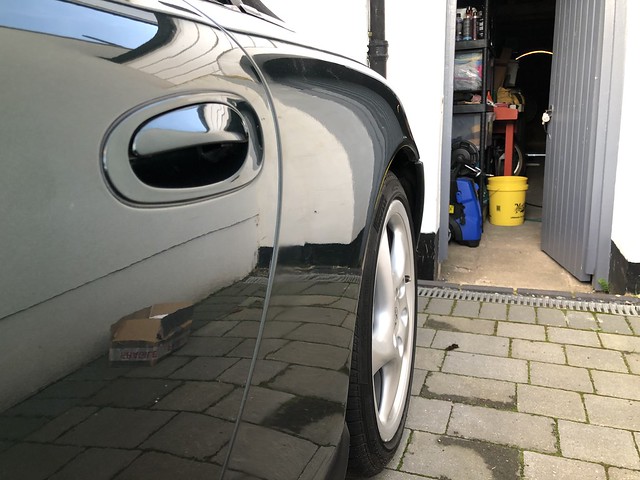
Anyway, lets get on with it. Most importantly, this is the car or how it was when I went to view it -

51902329470_d365d927af_c.jpg


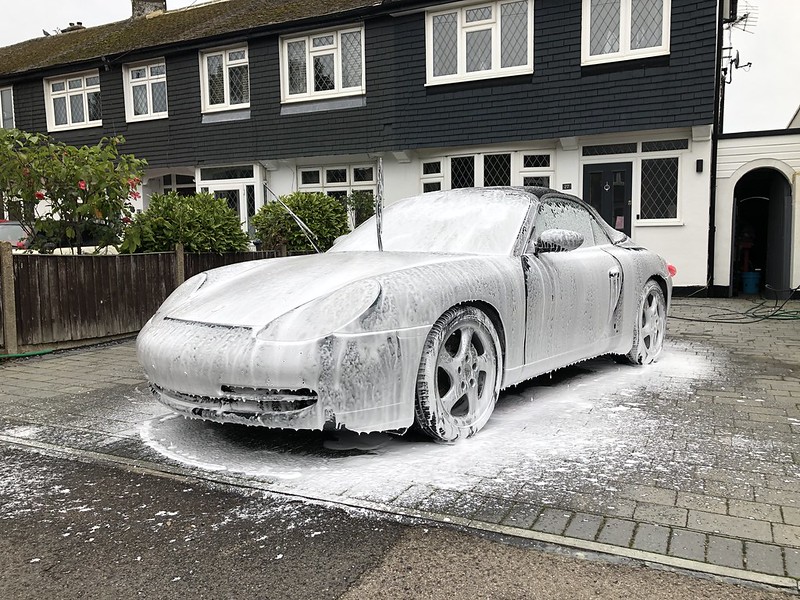
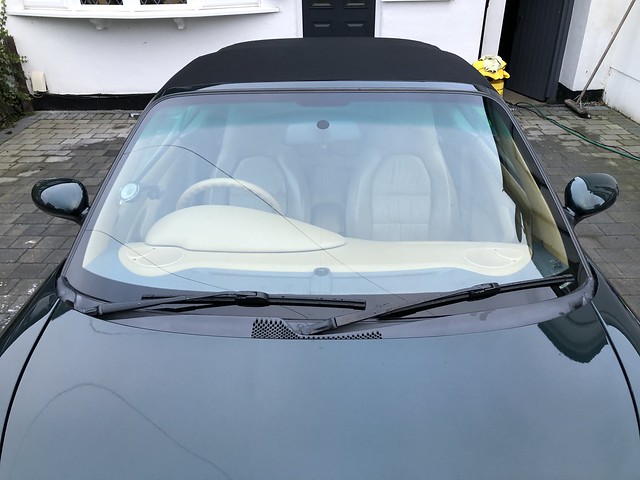
The car is a '99 Carrera 4 Cabriolet in Rainforest Green Metallic over Savannah Beige. I've always been a huge fan of 'Green over Tan' so when this one appeared on Auto Trader I had to go and look at it. It was actually the second time it got listed, not selling the first time round and so was relisted a few £k cheaper. In the end I was lucky to seal the deal as the seller had plenty of interest offering all sorts without even viewing the car! Some more pics from my 2nd visit with a friend of mine who owns a few Porsche's so came to have a look over -

51901647711_18e29a1a53_c.jpg

51901703786_e5cc82a41e_c.jpg

51901653816_6314fd8823_c.jpg

51901736268_e03c396482_c.jpg

51901800428_5a847b3c44_c.jpg


Anyway, a deal was done based on a PPI, which I (& the seller!) patiently waited 2 1/2 weeks for! The car was put in to Brookspeed as they were the local specialist to the seller -

51901632776_9f891ce3ab_c.jpg


The list of things found on the PPI was short -

- Nail in n/s rear tyre
- No locking wheel nuts
- N/S/R shock leaking
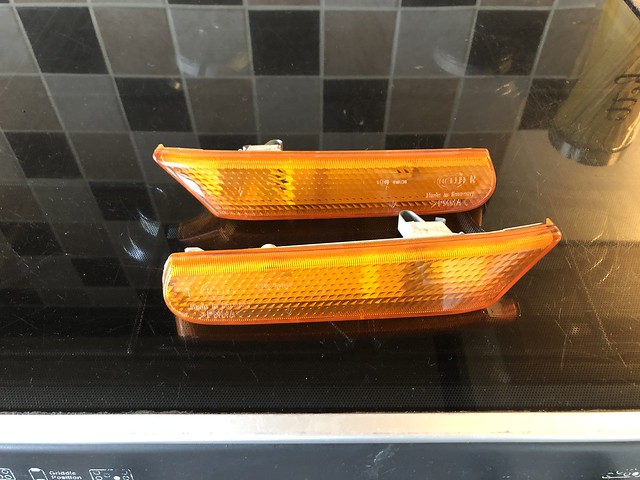
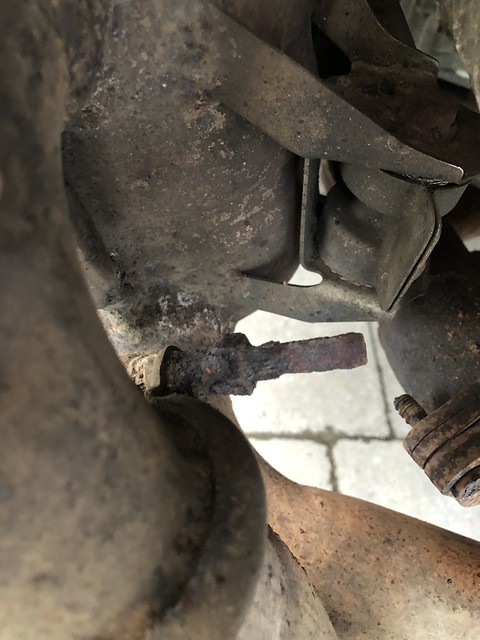
- Exhaust bolts corroded (literally all of them!)
- Rear coffin arm bushes worn
- Coil packs cracked

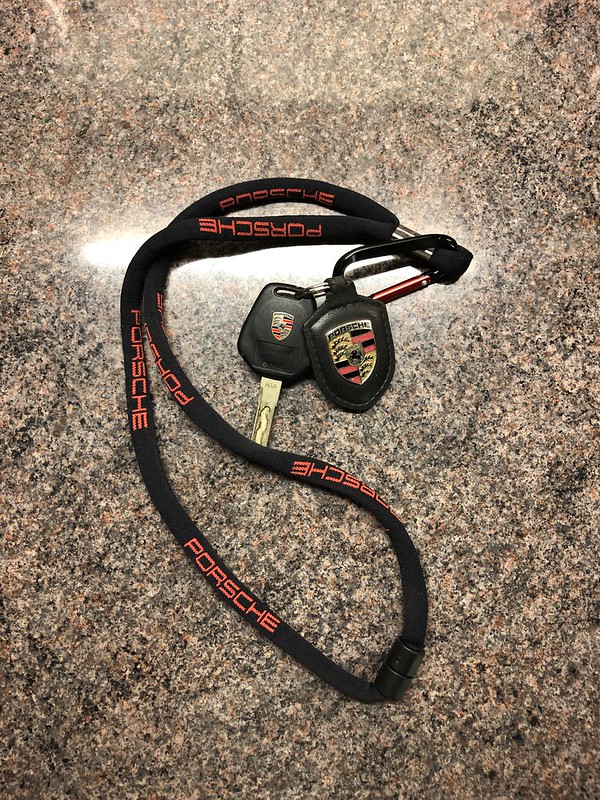
They advised they had the Beru coil packs on the shelf which are thicker than the ones that were on there so I confirmed the deal with the seller and asked Brookspeed to include the coilpacks in the major service I'd asked them to undertake, as well as Gearbox & Brake fluid changes. The car was finally mine! I picked this lanyard up at the Nurburgring 4-5 years ago, I must have known...

51900678332_474912dded_c.jpg
 
First thing I did when I got it home was give it a wash!

51901708851_3cb5d21681_c.jpg

51901728028_af8e16be97_c.jpg

51902021629_1a0fd41d28_c.jpg

51901679776_cb2e6cf339_c.jpg


Its clear this car has had some questionable paintwork in the past but I was aware of that from when I first viewed it and plan to have it resolve at some point, its certainly passable for now.

On a dry day I stripped out the interior to give it a good clean, it was clear it hadn't seen some love in a while -

51901969559_201d90945b_z.jpg

51901977379_0c9497c064_z.jpg

51900714257_6d98f07b94_z.jpg

51901782453_1c55b4470c_z.jpg

51900668012_b5bc79b4d1_z.jpg

51901758343_8a95a321ec_z.jpg

51901644606_a4b23deaff_z.jpg

51900719312_c69c4edf26_z.jpg

51901988129_d5c49df55d_z.jpg

51902284175_cb18d06993_z.jpg

51900702472_20d787d393_z.jpg


Annoyingly, I didnt seem to take any after photos! Anyway, it cleaned up great with an interior cleaner, hoover and plenty of elbow grease and looks a lot better than it did, despite still having age related marks etc.

When I bought the car it was quite muddy underneath, on the undertrays and arches with marks on the passenger side sill suggesting it had driven through quite a muddy area at some point or as I more suspected (and later potentially confirmed) the car had come off the road at some point. When I stripped out the frunk I also found one of the floor plugs had been pushed out and a lot of mud had ingressed which I cleaned & hoovered out. The plug was still under the carpet so put it back in place -

51901687606_db08bd7ebd_z.jpg

51902310755_3e6b8b0299_z.jpg


Going round the car found further areas that I'll need to get addressed at some point -

51901679256_a8f0ebf385_z.jpg

51902355675_68595e4e1c_z.jpg


Under the rain trays didnt look much better -

51902312195_5d02c378e3_z.jpg

51901640796_d182ec3fc0_z.jpg

51902347605_e441911571_z.jpg

51901677491_3e3a11cf72_z.jpg


All the leaves were hoovered out, the area cleaned and the battery tray removed, wire brushed and repainted. You'll have to believe me because again I didnt take any pictures again!

Whilst I'm here, any ideas what this might be? The wires run to the battery and under the dash by the looks of it. Have left in the car for now but want to eventually remove if redundant -

51902319970_597897d3d6_z.jpg


One of the other suspects in making me think the car has been in trouble in the past is the passenger sill/arch spat. I took the opportunity to replace both sides -

51902332770_d4e0e37f07_z.jpg

51901636391_51f80d4f7b_z.jpg

51901749823_c29d02353d_z.jpg

51902020004_e076f32e4b_z.jpg

51902315270_865270821b_z.jpg

51902292835_0a3d585c4b_z.jpg
 
First modification time! Its small one & cheap too but makes a really nice difference when you put your foot down. The induction noise sounds great and becomes very addictive. You can also see the replacement boot strut I fitted, common problem and easy to change -

51900670622_2f9d8d7a67_z.jpg

51901963469_ca5c99026e_z.jpg

51900725787_910a288c25_z.jpg

51901762368_ee957d05ca_z.jpg


The handbrake had a lot of travel in it so I did a bit of research online, watched a few videos and decided to take on the adjustment myself, which thankfully turned out pretty straightforward. Took the opportunity to give the inner arches a bit of a clean whilst I was under there -

51900677407_a029e9c90e_z.jpg

51901999484_c5be9443de_z.jpg

51900741487_323a8e0d95_z.jpg

51900713707_740b9e0d55_z.jpg

51901983304_b695dbb477_z.jpg

51901960594_ac409ce8ae_z.jpg

51902333285_82cd897430_z.jpg

51901750773_a3db2a80fc_z.jpg

51901966549_2f6a6bbd32_z.jpg

51902340325_8fbd3233cd_z.jpg

51901752553_116c6523e5_z.jpg


Took the trunk plastics out to clean up too and actually took some pictures of the cleaner tray this time -

51901764408_46ee26b330_z.jpg

51900745597_71427d6907_z.jpg

51901680886_8648575760_z.jpg


The car hunts on idle. It was worse but is not completely fixed so suspect vacuum leak somewhere. At some point I will replace the whole vacuum system but I started with cleaning the throttle body & replacing the gasket and thought I'd replace the belt whilst I was at it -

51901990949_0aa517d950_z.jpg

51900675537_5bb23700a7_z.jpg

51901960099_414d64aa68_z.jpg

51900744422_cd5c634ca6_z.jpg

51901754458_e22d9a0a62_z.jpg


Whilst I was there I did some poking around with the torch and think I found one of the culprits in the hunting idle -

51902007359_58f24e107a_z.jpg


I missed an update! My first private plate for my first Porsche -

51902337435_ee928671dc_z.jpg


Then took it to my first meet, Porsche Club GB Region 29 at Redhill Aerodrome -

51902015394_a28c6247b8_z.jpg

51901968619_425845c7bc_z.jpg

51902318145_d5c9752db3_z.jpg
 
Always been a fan of the US look side markers. Obviously they came on the full amber cars over here anyway so was able to source a pair from a Boxster, cleaned them up and fitted them. I think they look great against the green -

51902339815_d2a4e59cee_z.jpg

51901734663_299d3ded87_z.jpg

51901757738_47284a9828_z.jpg

51901650721_ce57f0cb4f_z.jpg


Decided to tackle the vacuum valve to see if that would help the idle. First step was to remove the alternator, what a ladies intimate part that job is! Managed to get to the valve and swap it out somehow, not much room for activities in there!

51902283530_5920f17e81_z.jpg

51901688421_105a9e9ec1_z.jpg

51901755048_b3c0acbde1_z.jpg

51901641786_4309a00990_z.jpg

51901789778_b92df6a331_z.jpg

51902001319_7bb2446957_z.jpg

51900723597_ba5e2023e2_z.jpg


Nephew approved!

51902317935_2754b0cc83_z.jpg


Car suffers from the common starting issue when hot so checked out one of the earth cables which seemed fine so suspect the Y-cable will need to be replaced -

51900709867_79c68e51c4_z.jpg

51902299370_4845e5aa8c_z.jpg

51902036674_8561e17036_z.jpg

51900716712_9e243a38c1_z.jpg


Felt the rear wheels looked a little lost so opted for some 15mm spacers after reading advice on here -

51902332535_ea9046e044_z.jpg

51902020334_95673d72da_z.jpg

51902315700_bb50a3d63c_z.jpg


Swapped out the standard wipers for Aero Wipers. I think it looks cleaner and find them more efficient. Also took care of the wiper placement whilst I was at it -

51902030299_7a718b272f_z.jpg

51900687052_b9f397b3cf_z.jpg


Took a drive to Goodwood one Sunday morning for some breakfast with a couple of mates -

51901787993_f88327589a_z.jpg

51901967039_e05fe6abbb_z.jpg


I decided I wanted to get the Gundo hack done after hearing the difference it made. However, after a friend inspected the back boxes he advised they were in a poor state and ideally needed replacing, so I took him up on his offer he didnt realise he made! Fortunately it was around Black Friday so managed to get a deal on the Miltek system. Plenty of fun was had fitting them! (Note self tappers in bumper and damaged support bar suggesting this was definitely hiding a previous bump). At the same time managed to pick up a set of RS engine mounts from this forum so fitted them up at the same time -

51900670962_da950b8cb3_z.jpg

51901687056_d1b99803b7_z.jpg

51902282905_914c5fb340_z.jpg

51902327780_b48d69166c_z.jpg

51901722088_6e2f79e402_z.jpg

51901752388_153ebe7e08_z.jpg

51900676582_9f559fa803_z.jpg

51901689256_7a731e907d_z.jpg

51901985669_f83cc9b280_z.jpg

51900723577_34f0c9f9eb_z.jpg

51901670021_e31cec2780_z.jpg

51902007149_b1f15c28b0_z.jpg


Replaced the bonnet badge gasket as the old one was perished -

51901752258_7610b887a2_z.jpg


Purchased a SSK after driving a friends 997 with one fitted. Whilst fitting that I also tackled the hinge replacement of the rear cubby hole that was broken as the centre console came out. Few more ancient coins found!

51901766233_c6089aefb7_z.jpg

51900740592_05b50e60ae_z.jpg

51900690392_553c8e62db_z.jpg

51900748387_4a59dd1526_z.jpg

51901726473_48aeb700b5_z.jpg

51901690031_d1df180585_z.jpg

51902293460_e0a8da9c62_z.jpg

51900745602_7559f0f1d3_z.jpg

51900694877_5a7b4859e9_z.jpg


What a difference it makes! So happy with how it feels, the driving experience is even better for it. A very cheap mod with a huge impact.

The foot rest randomly snapped in half one day so decided to replace that and the pedal covers whilst I was there as they had worn through -

51901986064_5ebfbffaa4_z.jpg

51901735998_c4655020c9_z.jpg


I think I'll opt to replace the accelerator pedal at some point. Its worn and there is play in it and I dont like the suggested 'fixes' but it doesnt bother me for now.

I noticed one of the undertrays was broken so ordered up a replacement. Annoyingly whilst under there noticed the other undertray was also broken so will have to replace that at some point. Removing the old one certainly added to the story previously thought -

51901743393_eafa2bcec9_z.jpg

51901801763_e79a006e23_z.jpg

51902013564_6bedf4909f_z.jpg

51901659726_30dbd7d4e8_z.jpg

51901666121_a81ce86b73_z.jpg

51901973469_25d7d3029f_z.jpg

51902286330_8b7f473767_z.jpg


Got bought an amazing Christmas present from a friend -

51901963379_95884eff3e_z.jpg


Not many pictures of the install as it was a bit of a pain due to the lack of space but retrofitted the Comfort Turn Signal kit from VW. I had this exact same kit fitted to a Mk4 Polo back in the day, works a treat!

51901982679_93bf9f4c88_z.jpg


There is a constant 'whining' noise from the car. I've found videos online showing the same whine as mine and the general consensus was 'its normal'. Im still not convinced thats the case but am trying not to worry about it too much. Despite the noise being there when the belt was removed I decided to replace the bearings in the tensioner & idler pulleys for peace of mind -

51901745818_22d82369ce_z.jpg

51901708216_119b6db623_z.jpg

51900718872_a752cbfec3_z.jpg

51900695392_c62279c1e0_z.jpg

51900726167_771ffb951d_z.jpg

51901755888_eab8dc07b8_z.jpg


The next big job on the list is suspension. I plan on replacing all the arms and fitting coilovers but whilst thriftily burying money away I stumbled across THE set of wheels I want for this car, a set of Gemballa Le Mans. I first saw the set on a 993 last year and knew they would be perfect for me and this car, huge impact without the maintenance of split rims -

51901982464_7743478a52_z.jpg


Long story short, bought them from the seller in Germany, DHL collected them and from that minute they vanished. DHL have confirmed they are missing so all I can hope for now is a refund, which thanks to Putin will not doubt be less than I sent initially due to the Euro dropping! It is a sad chapter and I'm a little frustrated but what can you do, it obviously wasn't meant to be as a friend told me.

So the last and most recent update, I decided to replace the manifold to cat gaskets. I saw a post on this forum from someone recommending these replacements and knowing mine were blowing and seeing the state of the joints when replcing the exhaust I ordered up a set and set to work -

51902358545_43d901a74f_z.jpg

51901988834_5014294239_z.jpg

51901964794_9a680f2590_z.jpg

51901689741_e68446ddb6_z.jpg


I had to get the studs removed as I just didnt have the tools for the job. I bought new stainless hardware and refitted with the new gaskets.

Since fitting the new exhaust the back box to cat clamps have been leaking. The clamps appear to have crimped allowing a large hole to appear that even a boat load of exhaust paste cant contain. I was hoping to resolve this in the refitting of the cats but no such luck, even with loosening off the whole system. I'm going to buy some new genuine clamps prior to its next service and ask the garage to sort as Im limited to what I can achieve -

51901642231_a639eebc06_z.jpg


The fitment was a nightmare to be honest, took far too long, new clamps broke when fitting, I was glad to see the finish line -

51902356260_53a5bab8e6_z.jpg


I managed to secure a pair of the Tequipment EP4110 tips on eBay so fitted them up at the same time -

51901962959_5115db53b2_z.jpg

51901731178_0e61b9dee0_z.jpg

51901698501_1231bc4194_z.jpg


The came the real kicker. As if the whole exhaust experience wasnt enough the car had one last surprise waiting for me. if you've read the rest of this thread you'll notice I've reference possible previous damage and various signs suggesting its been repaired (badly) at some point. Well the terrible paint on the rear bumper was nothing to the next surprise waiting for me -

51900685277_7a5ed9b4e6_z.jpg


That whole section is cracked! Completely broken. When refitting the bumper the flex required has obviously caused the previous repair to fail, no surprise considering it looks like filler which isnt known for its flexibility. So 2 steps forward...I now need a new rear bumper and it painting! Its on the to do list but it isnt getting moved above the suspension so will be dealt with at a later date. At least the tips look better -

51901795573_e47d39b941_z.jpg


So that brings it up to date for now. Hopefully going forward I'll be able to add to the thread as and when changes happen and continue to use the knowledge found here to help me along - cheers!

Rob
 
What a good read.

I love the resulting cleanliness and the colour combination.

Great post well done.

Re the rear bumper: Jus repair the bumper properly and paint it. All you need to do is bond the crack first. I have seen it done at the body shop i use and it works a treat.

keep updating.
 
The missing items upfront that the manky sockets should be plugged in to are your alarm siren and tilt sensor.
 
martin t said:
What a good read.

I love the resulting cleanliness and the colour combination.

Great post well done.

Re the rear bumper: Jus repair the bumper properly and paint it. All you need to do is bond the crack first. I have seen it done at the body shop i use and it works a treat.

keep updating.

Thanks Martin, appreciate it!

Good to know about the bumper, will save some hassle and cost so will speak to a bodyshop recommended by a friend about that soon.
 
Alex said:
The missing items upfront that the manky sockets should be plugged in to are your alarm siren and tilt sensor.

Thanks Alex. Which could explain why I've never heard the alarm? And also that there could be a problem I guess if its been unplugged. Or are you saying the siren & sensor are not now fitted by looking at it?
 
They live at the side of the battery like so:

post-4-1173201098.jpg
 
great to see another one getting some TLC, & a lovely colour combo
 
Great write up, thanks. Lovely colour combo! Did you have any luck with the wheels in the end? If not shame as they look great!

Would definitely try repairing the bumper first, you can reinforce the crack from the inside face with fibreglass sheets (DIY kit from Halfords) then hopefully just a localised spray job from a mobile guy.
 
When you did your induction pipe, did you remove the Helmholtz box inside your airbox? Doing so creates more air flow through the filter as the box covers part of it.

With:

airbox_lid_173.jpg


Without:

hhr_removed_195.jpg


And then fill the hole with an Aluminium insert like so:

AIfeZPn.jpg


with one of these (on the left):

ZmSTXdk.jpg
 

New Threads

Forum statistics

Threads
124,627
Messages
1,442,246
Members
49,070
Latest member
janders365
Back
Top