Porsche 911 UK Enthusiasts Online Community Discussion Forum GB

Welcome to the @Porsche911UK website. Register a free account today to become a member! Sign up is quick and easy, then you can view, participate in topics and posts across the site that covers all things Porsche.

Already registered and looking to recovery your account, select 'login in' and then the 'forget your password' option.

CLR Alfa Project

Another little update now that the fuel system is complete.

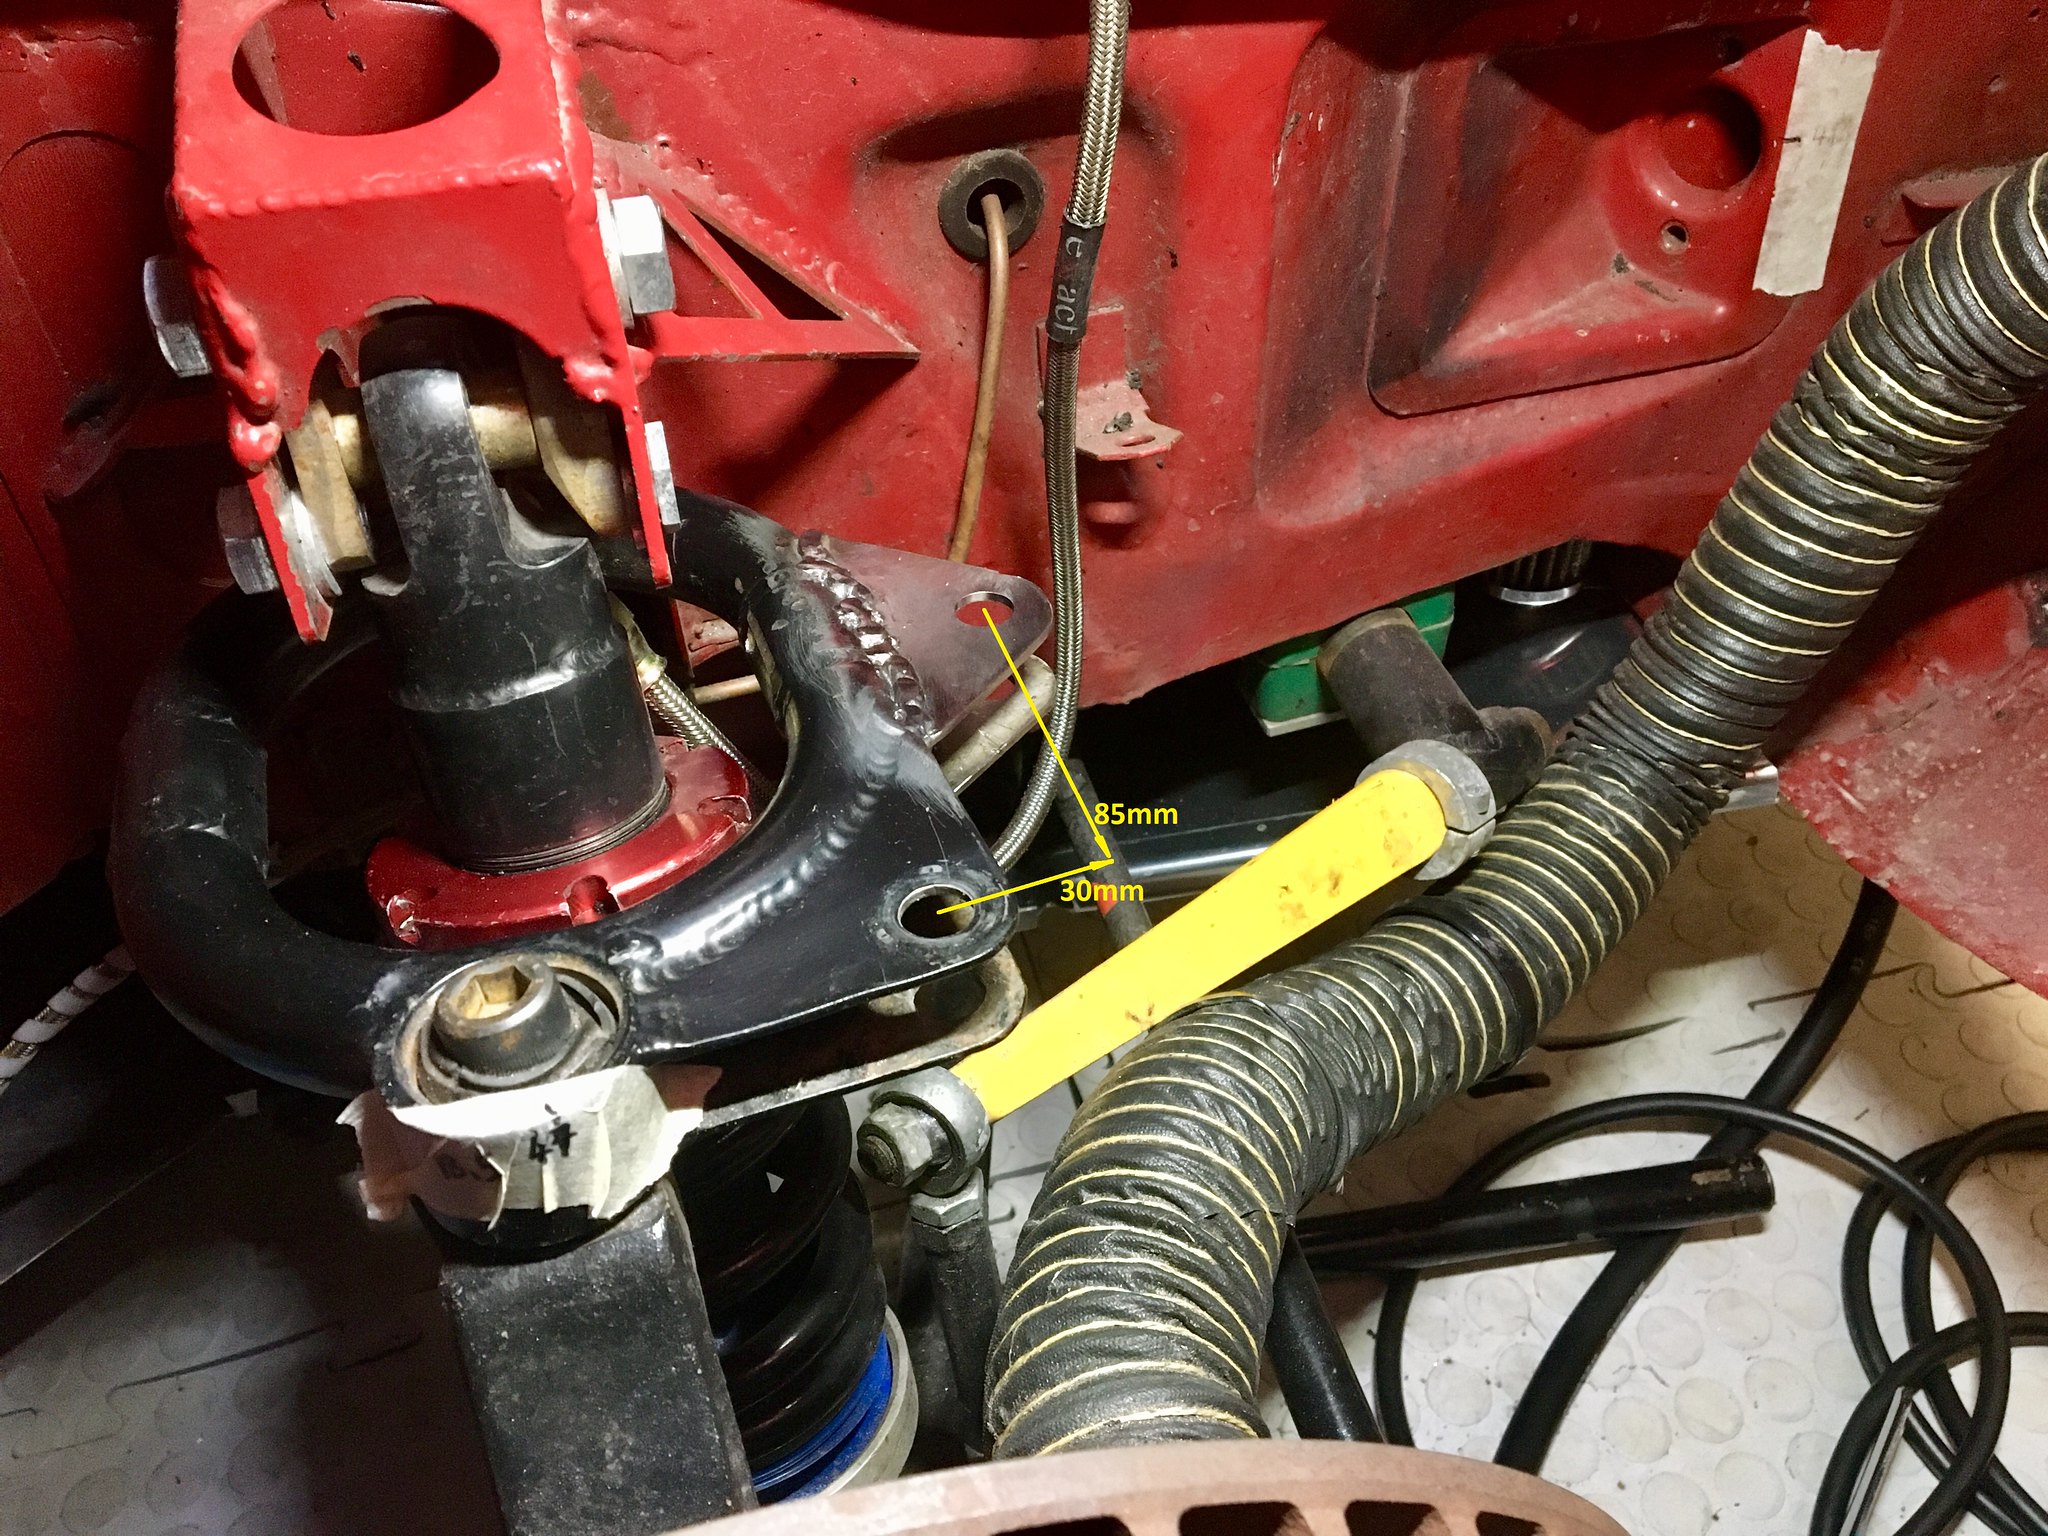
Made another little titanium mounting bracket for the rigid section of the fuel return pipe:

49455662063_9e211123ca_k.jpg


Which fits here:

49455660968_11bce3cfba_k.jpg


Engine bay fuel lines new layout:

49456361872_ed71a14379_k.jpg


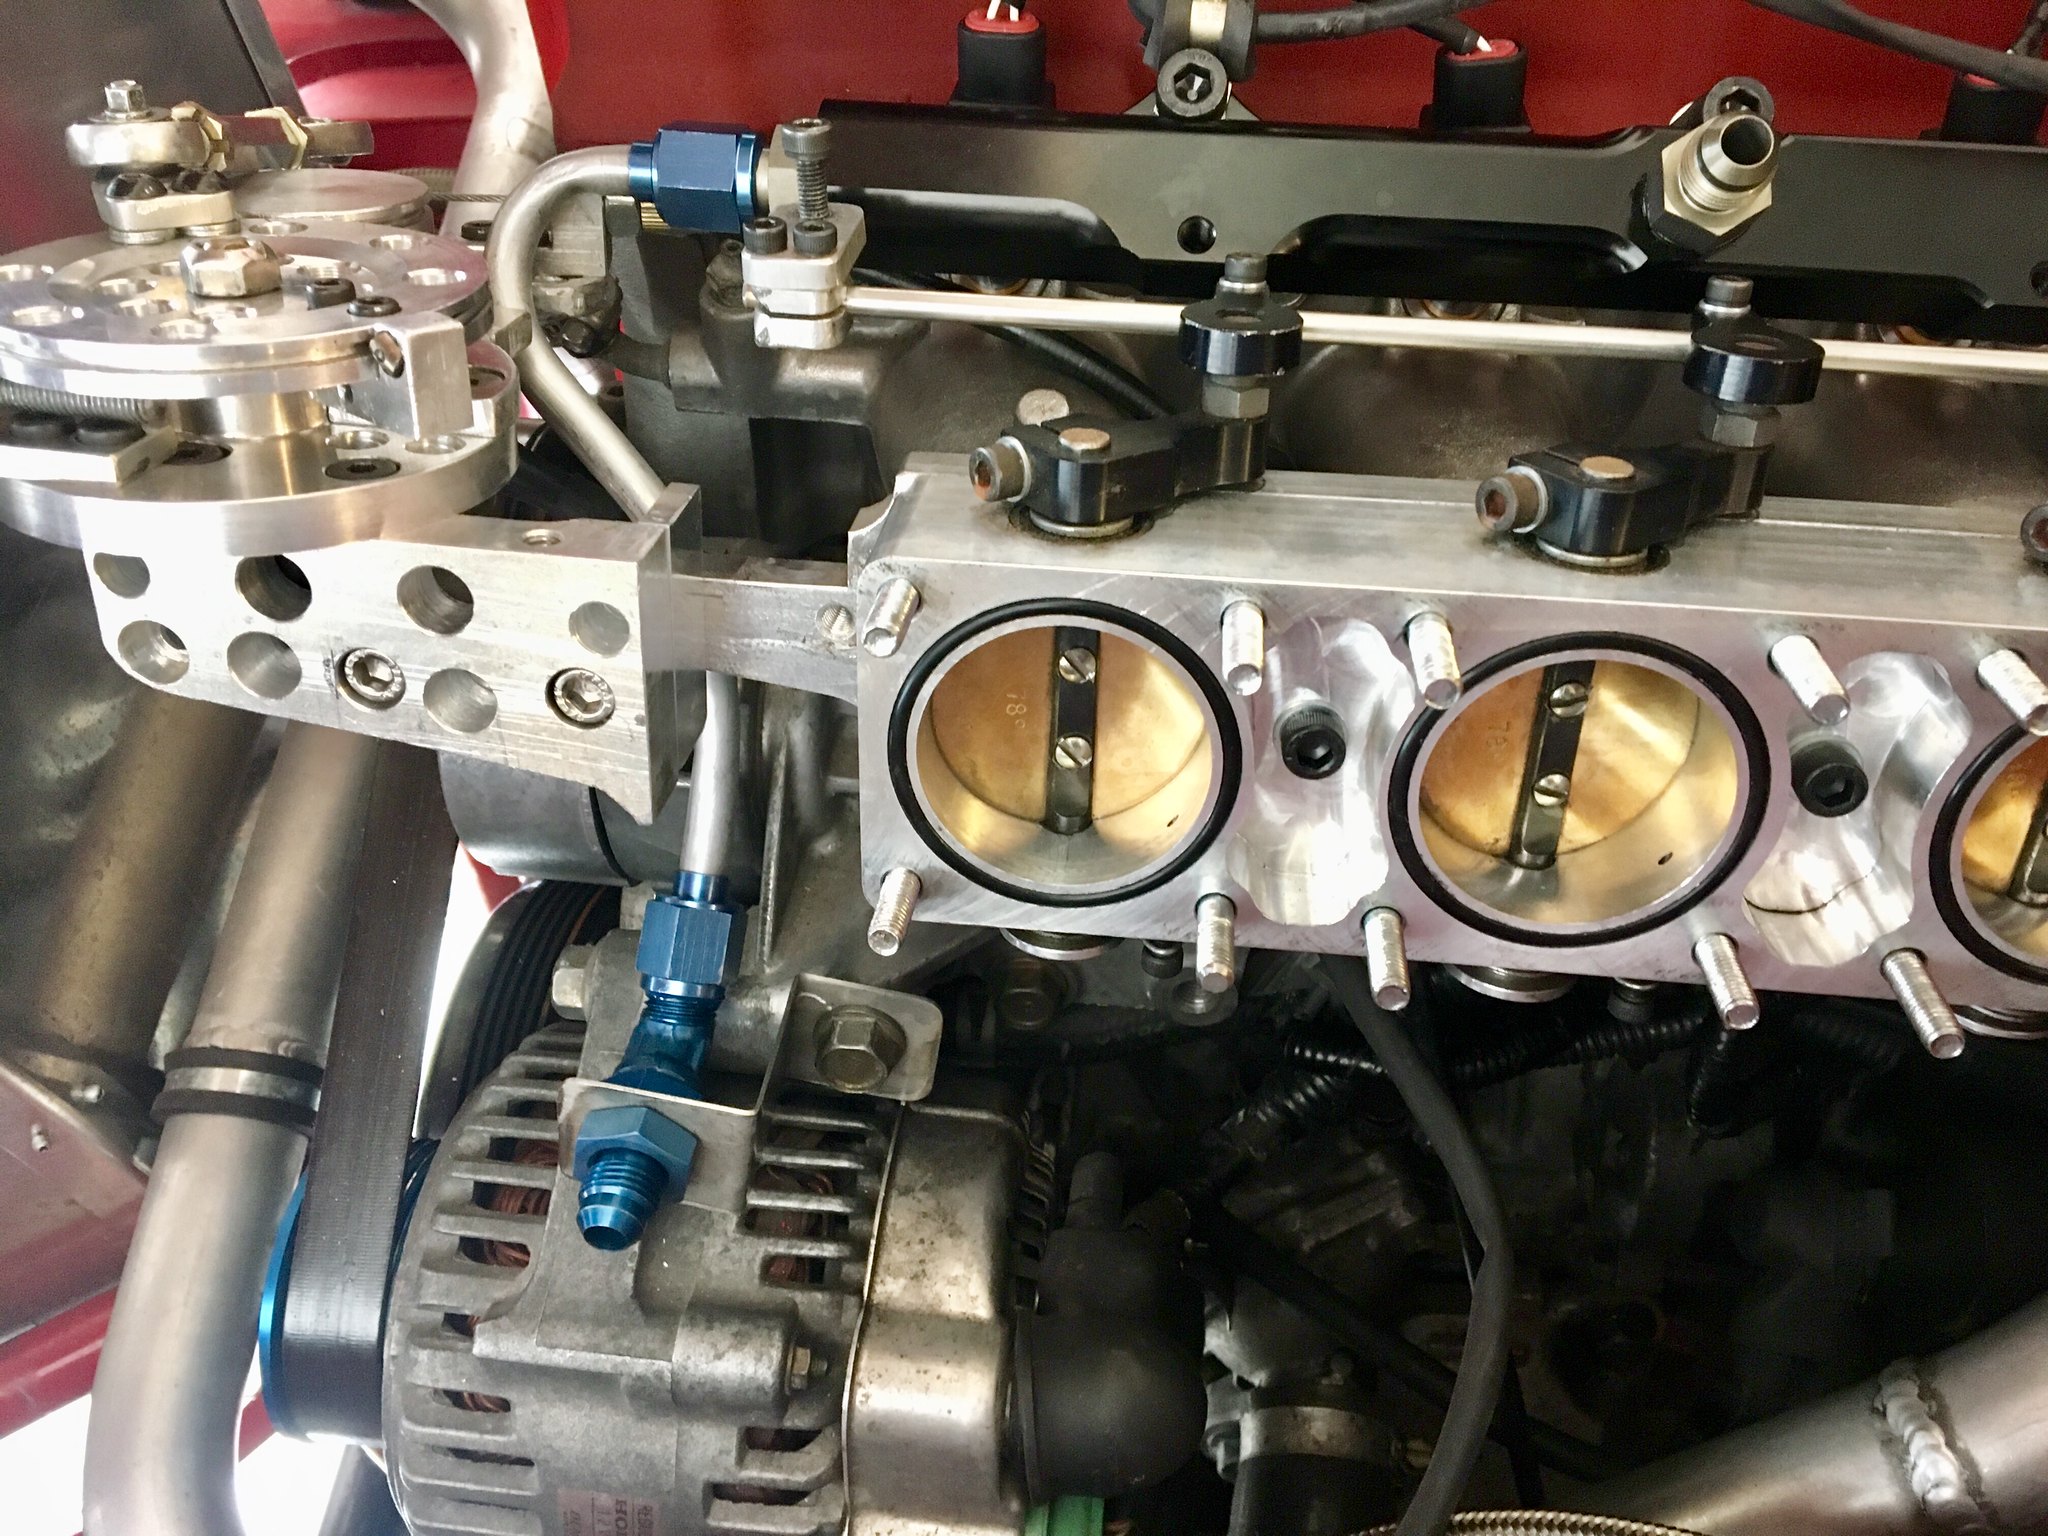
This picture gives a close up high-lighting the tight tolerance clearance issues referred to earlier:

49456129631_968d2a689f_k.jpg


Final assembly:

49455657298_b28a2f82aa_k.jpg


49456357967_c5e40ccae3_k.jpg
 
Amazing work, as ever. I think we've all run out of superlatives by now. :grin:

That throttle assembly is a work of art.
That car has found its rightful owner in you Richard. :thumb:

Must admit, I quite liked the black arches. Kind of like an early Skyline. I can see the attraction of simplifying the lines though. Such a cool car. 8)
 
Marky911 said:
Amazing work, as ever. I think we've all run out of superlatives by now. :grin:

That throttle assembly is a work of art.
That car has found its rightful owner in you Richard. :thumb:

Nail. Head. Hit.

Superb Ritchie, the attention to deal is impressive. :thumbs:
 
Marky911 said:
Amazing work, as ever. I think we've all run out of superlatives by now. :grin:

That throttle assembly is a work of art.
That car has found its rightful owner in you Richard. :thumb:

Must admit, I quite liked the black arches. Kind of like an early Skyline. I can see the attraction of simplifying the lines though. Such a cool car. 8)

You're a real gent marky ;)

I'm with you mate, loved the strong muscle look but the reasons for change were twofold:

1. I couldn't get the car in the garage due to all the aero stuff grounding.

2. To get it through a TUV will be virtually impossible with all the race-car gear fitted.

For me I love the look of the car in either guise and to be honest I really couldn't say which one I prefer so it is no loss; in fact I've saved a serious amount of weight, reduced CofD, improved engine cooling and reduced cabin temps (as exhaust now has a clean airflow).

Again thanks for your kind words ;)
 
Another update: I'm happy to say the first mapping session of this project is now done. This car is very tricky to map for road compliance due ITB set-up and most of the usual engine creature comfort systems of a road car are removed (IAC, MAP...). Still the car now idles and a quick blip of the throttle didn't blow it up :hehe: Much more to come; I want to get this map absolutely perfect so it will take a while... Video and a few pictures below
https://www.youtube.com/watch?v=Jr_yxovlVb8

49626507336_95faa1d929_k.jpg


49625988398_ec19065b57_k.jpg


49626781397_8c606d7a65_k.jpg


49455657298_b28a2f82aa_k.jpg


49456357967_c5e40ccae3_k.jpg


Major set-back with this project this weekend, just when I thought I was on the final stretch. Took the car out the garage for the first time with engine running in order to start some ECU mapping on the road. I then noticed very little steering lock available. Upon investigation I noticed the wheel makes contact with the thrust arm and steering rod. Also the tyre makes contact with the arch. Nightmare so lots of redesign to do...
49636622727_931460a195_k.jpg


Here is the wheel to thrust rod contact
49636347906_8dd7f2a906_k.jpg


With wheel removed it clearly shows contact point
49635820348_974e101bf0_k.jpg


Then made a few to scale calculations to work out how to create greater clearance
49636620892_dfbbfda543_k.jpg


Lots of head scratching later and I come up with a solution for the thrust rod clearance so cut some flanges out of sheet metal
49635818853_caea8abafa_k.jpg


Then carefully drilled exact holes and welded the flanges to upper suspension mount (Welding in situ so tricky access). This effectively creates an extra 37mm clearance (Thrust arm to wheel). Trouble is I will now have to cut the existing thrust arm into 3 sections then weld it back together as it is now 65mm too long.
49635818053_656cf51081_k.jpg


So new layout like so (minus forward thrust arm mounting point in pic as I have to cut the arm up to fit. More on that when I get round to it. So need to repeat this on the other side. Ordered some slightly smaller tyres, which will hopefully stop the arch contact (-22mm diameter), then need to find a solution to the steering rod contact. For this I'm hoping adding a little castor angle will be enough to create the clearance.
49636618637_bf381f795e_k.jpg
 
That's a minor hiccup for you Rich !! Either way, nice work sorting it :worship:
Do you abide my "house" mealtimes ? Or do you invite the family into the garage when it's time to eat ? :?: :grin:
 
Slippydiff said:
That's a minor hiccup for you Rich !! Either way, nice work sorting it :worship:
Do you abide my "house" mealtimes ? Or do you invite the family into the garage when it's time to eat ? :?: :grin:

The family hate the cars and all the antics associated with it so dinner for one it the garage it is :grin:

New flanges cut and welded here:
49655792452_c7620e2454_k.jpg


49655512136_917495624b_k.jpg


So thrust rod chopped up with 65mm removed:
49655786067_52bf3014e1_k.jpg


49655505616_c8832af37a_k.jpg


Before and after:
49655505051_e4559c72ea_k.jpg


Painted and fitted:
49654972638_6390d5e490_k.jpg


49655783812_80e5306abd_k.jpg


Following this I had to redesign the steering tie rod mounting point:
49655783252_def0c8e18e_k.jpg


Fitted new tyres then out for practically my first drive in the car. It was very wet, the geo was miles out and the car is only partially mapped but this short little drive gave a real indication as to the potential in this little Alfa. A wonderful car with much more to come...
49655511181_ff171a4aa5_k.jpg


49655509406_98b2cffc74_k.jpg


49655508776_cf957de359_k.jpg


49655787942_0211b81952_k.jpg


49655507341_0453b45b50_k.jpg


49654964263_8be9c81c4e_k.jpg
 
Cracking work Rich, The Mosel Valley looking as stunning as ever (even after a downpour) How does the old girl drive now you've carried out the front suspension mods ?
 
Slippydiff said:
Cracking work Rich, The Mosel Valley looking as stunning as ever (even after a downpour) How does the old girl drive now you've carried out the front suspension mods ?

Thanks H and you raise a good point on the driving front. My aim is to try and recreate the driving characteristics of the Alfaholics GTA-R 290 but this is not easy as they have a live rear axle and mine has a very complicated system, so much in fact it just cost me a bag of sand just for a geo. Also after 3 mapping sessions I have made a difficult decision.

So after much deliberation and calculation, I decided to try and fit a MAP sensor system, as mapping will be a whole lot simpler and smoother going forward. Trouble is there is literally no space as the underside of the inlet manifold has water pipes/looms/alternator... and the upper side has the fuel rail and throttle linkage.
So here goes, first off remove carbon airbox and remove complete intake system

49685975842_635690d81d_k.jpg


Here is the removed manifold. I worked out there would be around 1mm clearance if I tap into the intake runners below the fuel rail but only if I run the 1/8NPT tap fully down to seat the connectors as low as possible

49685673771_5dbfc01762_k.jpg


49685673446_0f8b6adace_k.jpg


49685673011_d5221fb4e3_k.jpg


49685974447_e49ee9e03e_k.jpg


Still in the process of rebuild and finding a place to fit the collection chamber but the critical and tricky part is all sorted ;)
49685974022_80e3f69847_k.jpg


Now the fun of rebuilding it all to look forward to :grin:


A load more work done on the car since the last update. MAP sensor system installed and car now mapped. The vtec system is now also mapped to kick at 4000rpm (normally just shy of 6000rpm) and she redlines at 9000rpm. On tick over it is like a pussycat but hit the loud pedal and I kid you not, it is probably the most fun possible without taking your clothes off. It leaves you shaking every time you step out of it. Still lots more work to do but the video above should give some inclination as to the direction of travel with this project.
Enjoy ;)
 
HSC911 said:
Sounds great...give us a go :dont know:

:thumb:

So long as you bring the brown trousers ;)

Just made another quick video this morning, nothing planned and no editing (primarily as I have no idea how to :grin: ), just a very general walkaround


Just as I was finishing the last remaining development work, I'll now be pulling out the engine and gearbox to diagnose a low compression issue I found in Cylinder No.3. Not at all planned but should be interesting to see some of the magic Honda created with the F20C engine

49791085978_d0e3de5dc9_k.jpg
 

Latest posts

New Threads

Forum statistics

Threads
124,629
Messages
1,442,290
Members
49,074
Latest member
nzed23
Back
Top