

911Time
Suzuka
- Joined
- 25 Sep 2018
- Messages
- 1,172
Hi all,
Having returned from our epic Highland adventure, I noticed that despite cleaning the windows before coming home, a film was beginning to form again on the inside of the windscreen.
Whenever this starts to happen more frequently, I think it's always worth checking whether the cabin/pollen filters are blocked and sure enough the cabin filter (located in the boot) looked in need of a change.
It's a pretty easy DIY job, not something you need to head to a dealer for, so you can save yourself money on labour/parts.
Anyway, here's a how-to guide and some info on where you can buy the parts at a good price:
Filter One
Filter one is fitted in the front, beneath the battery compartment cover. You don't need any tools for this - just a clean cloth and a vacuum, to remove any dirt/debris.
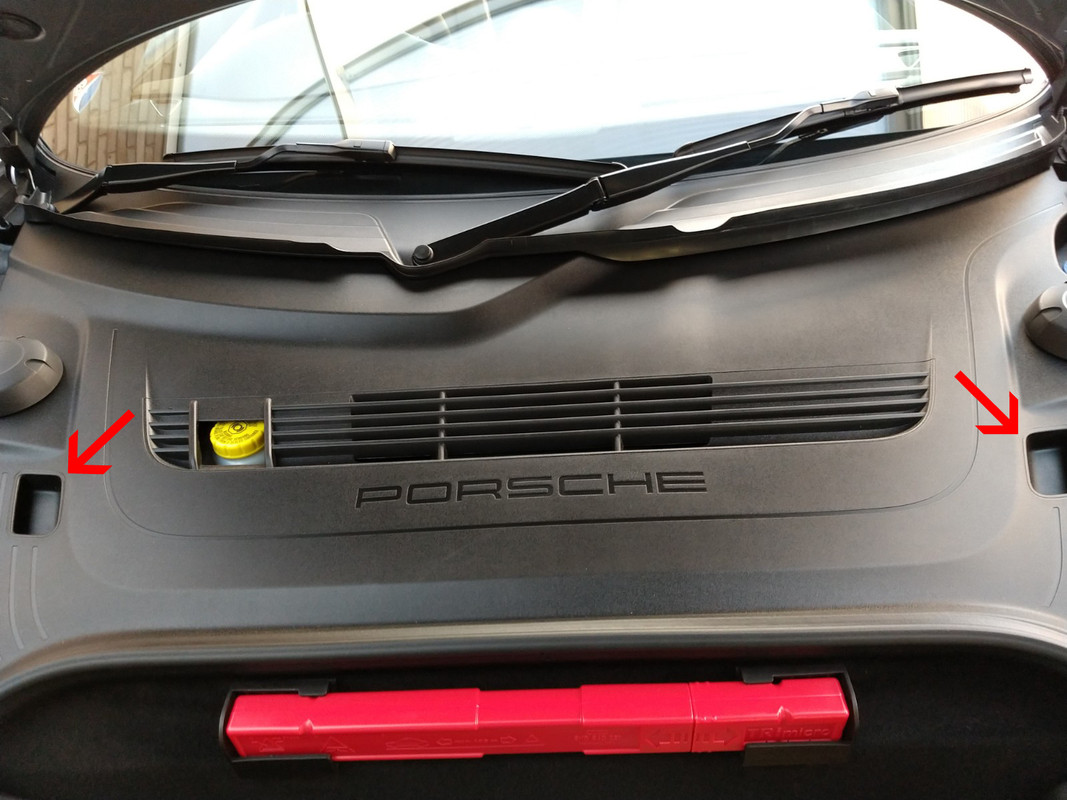
1: Open the boot and remove the battery cover by carefully lifting the cover and pulling upwards on the two recesses (see arrows) - slide the cover forwards slightly and you will see that it's located at the back edge on two yellow supports (when you refit, slide the cover back into place on these supports first before you press down the front and you will hear it click back into place).
2: On RHD cars the airbox for the heater is located on the back right-hand side - to the right of the battery.
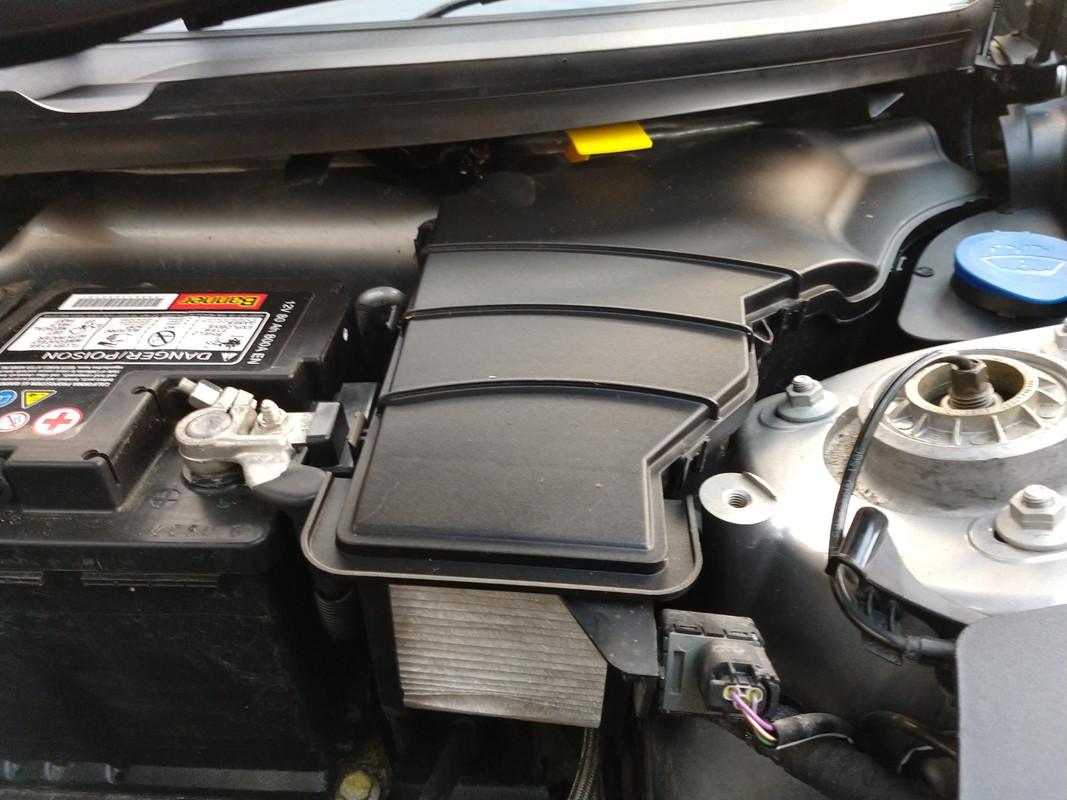
3: The top is held in place by plastic clips, working from front to back, simply push the head of each clip away from the centre of the top (right or left) with one hand, whilst lifting the top slightly with the other. You don't need to remove the top completely, as the filter can be removed with the top of the housing just lifted at the front.
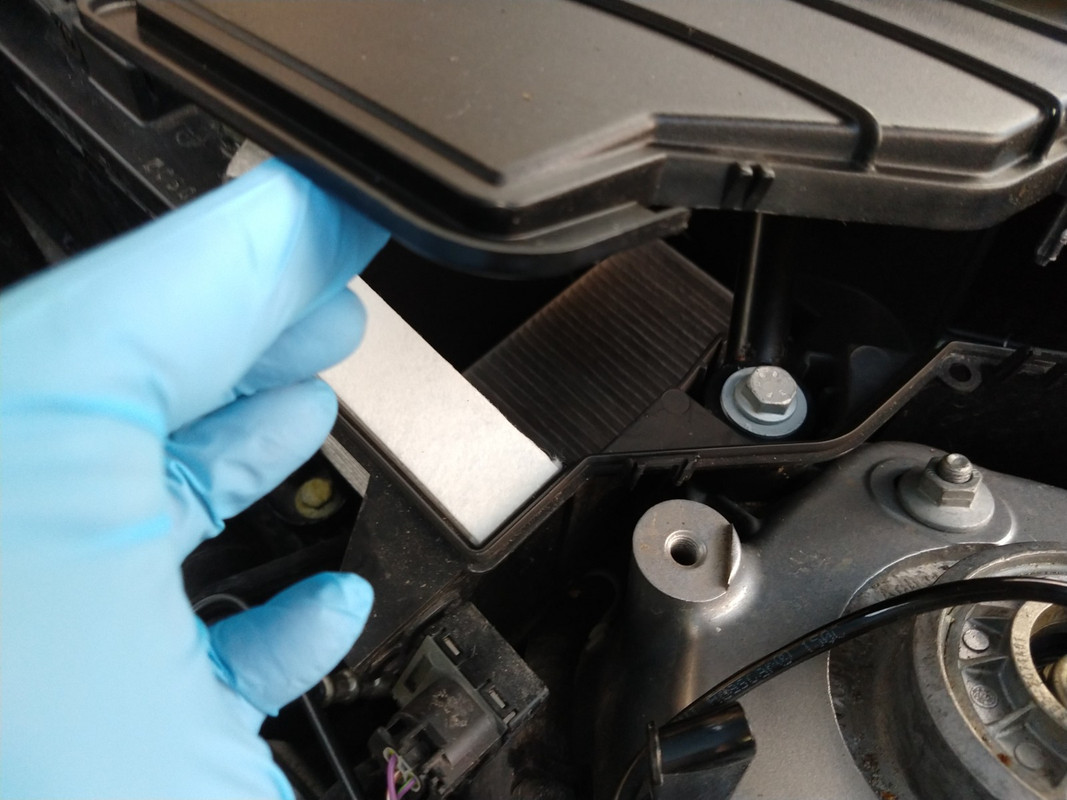
4: The filter sits in some plastic slides/grooves and forms a 90 degree angle within the filter housing and can be removed by simply lifting at the front and sliding out. NOTE: Before removing completely, note that with the wording printed on the filter there is an ARROW, which shows the direction of airflow - the TIP of the ARROW should be pointing towards the BACK of the filter housing and the TOP of the printed filter lettering should be towards the FRONT of the car.
If you replace your filter with a Porsche item this should be the same when refitting but if you use an OEM equivalent there may be no arrow, just the lettering.
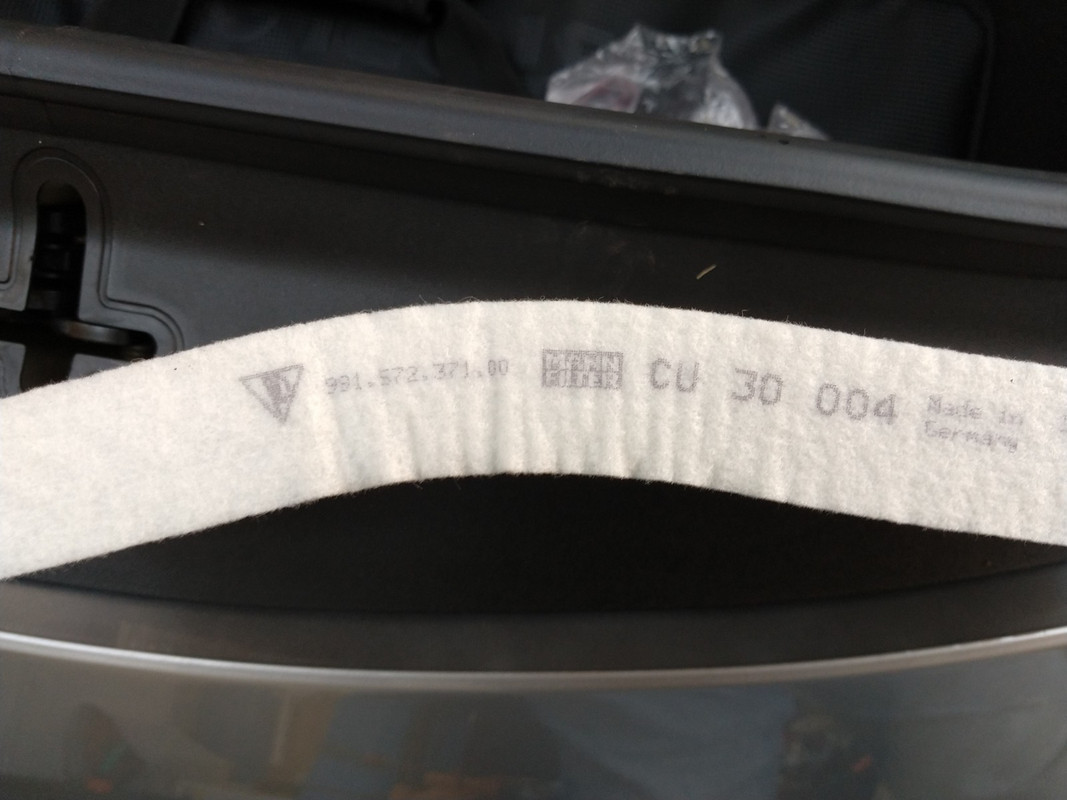
5: The replacement filter is Porsche Part No: 991.572.371.00 - MANN Filter Part No: CU 30 004 - the OEM MANN filter is exactly the same, as you can see.

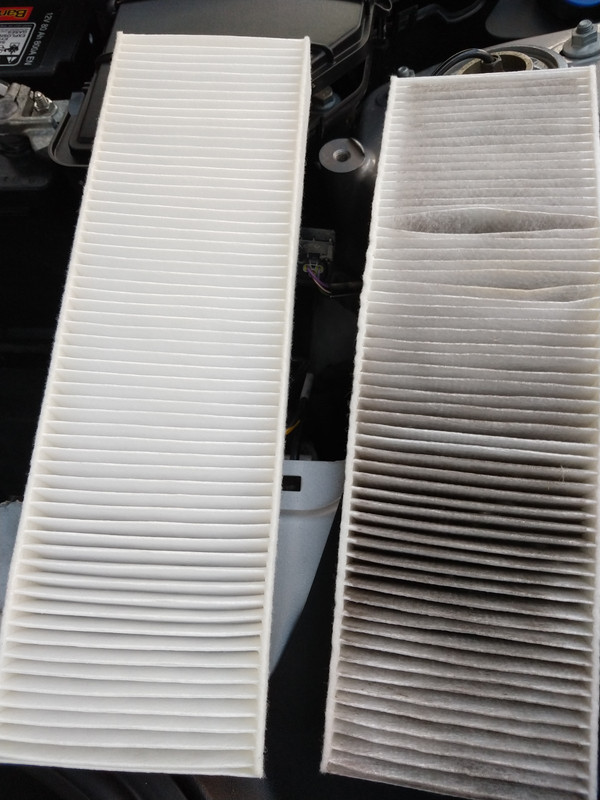
6: Old and New filters.
7: Before fitting the new filter, wipe clean the inside of the airbox and vacuum out any dust/debris from beneath the airbox, which might clog the new filter.
8: With the top of the lettering on the new filter facing the front of the car (as explained earlier), slide the filter down carefully into the slides in the airbox - pushing it all the way home until the back of the filter reaches the back of the airbox (this will concertina the filter slightly, so you may need to hold the back of the filter in place with one hand, whilst pulling the top of the filter back up a bit at the front, so it covers all the opening in the airbox).
9: Refit the lid of the airbox and battery cover, as described above. Despite the explanation here, it's a 5 - 10 minute job in reality.
One down, one to go")
Filter Two
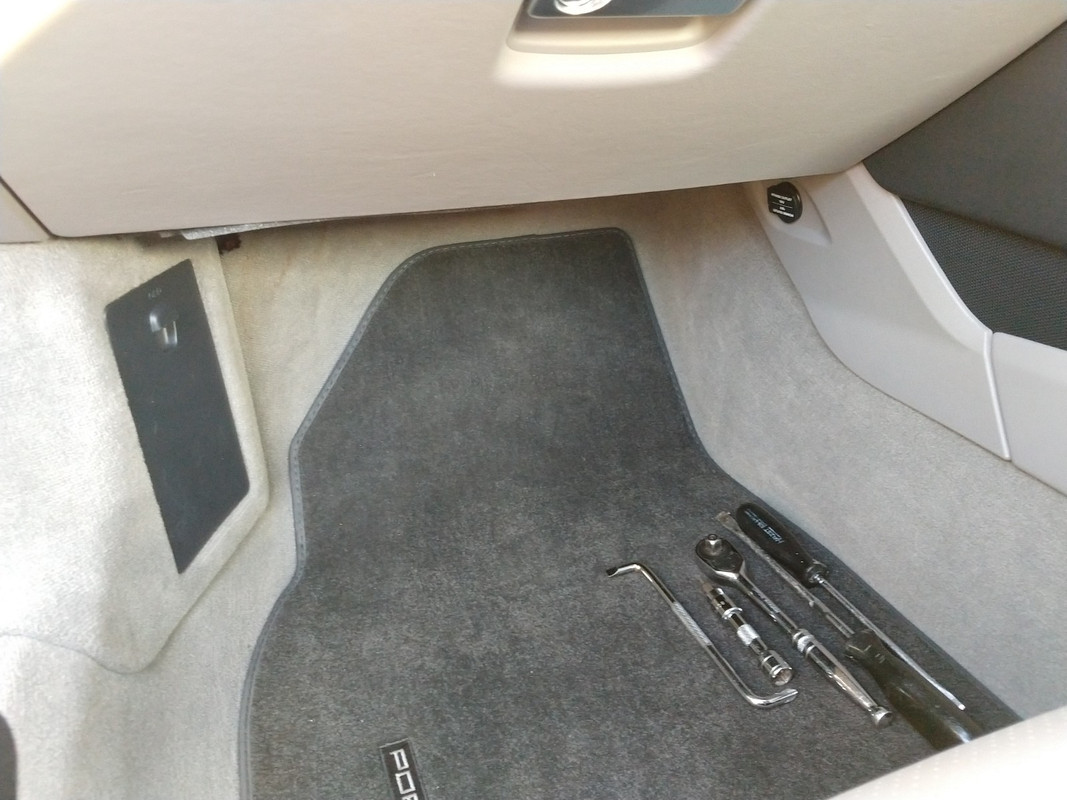
The second (activated carbon) filter is fitted in the passenger side footwell, behind the glovebox. For this you will need a torch and a stubby, large head (wide), slot type (straight) screwdriver OR a 90 degree screwdriver or wide screwdriver bit/ratchet, as for some of the screws there's not enough space to use a full-size screwdriver.
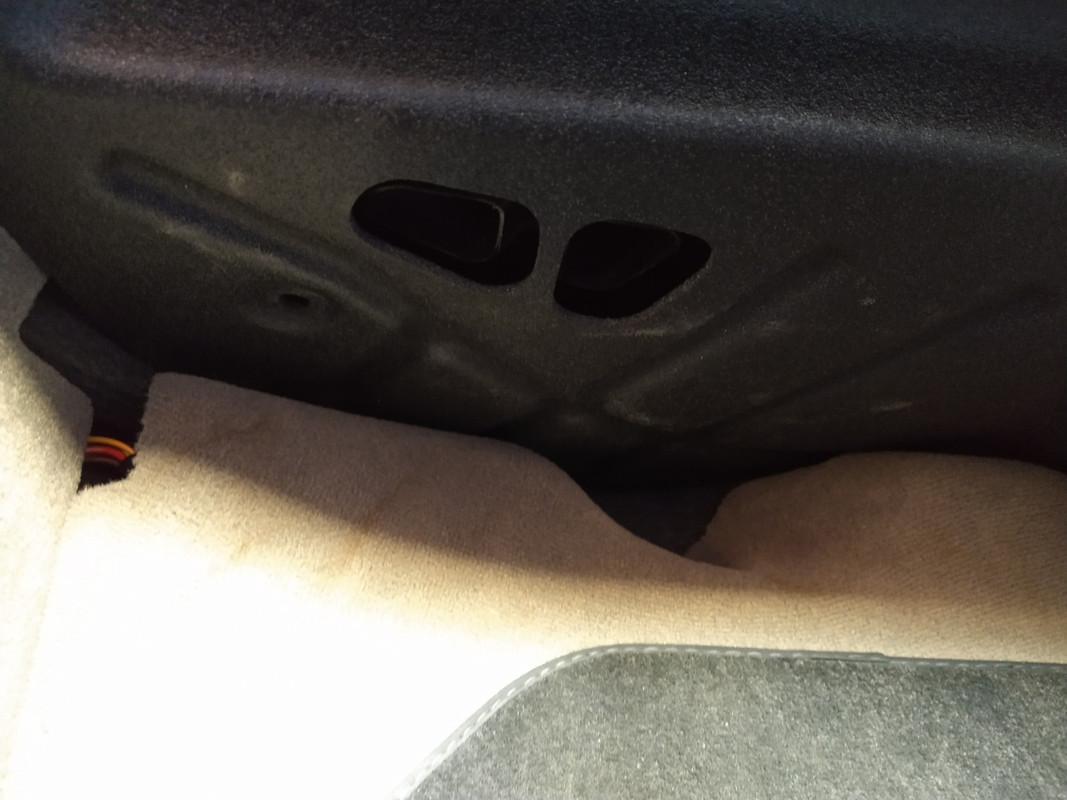
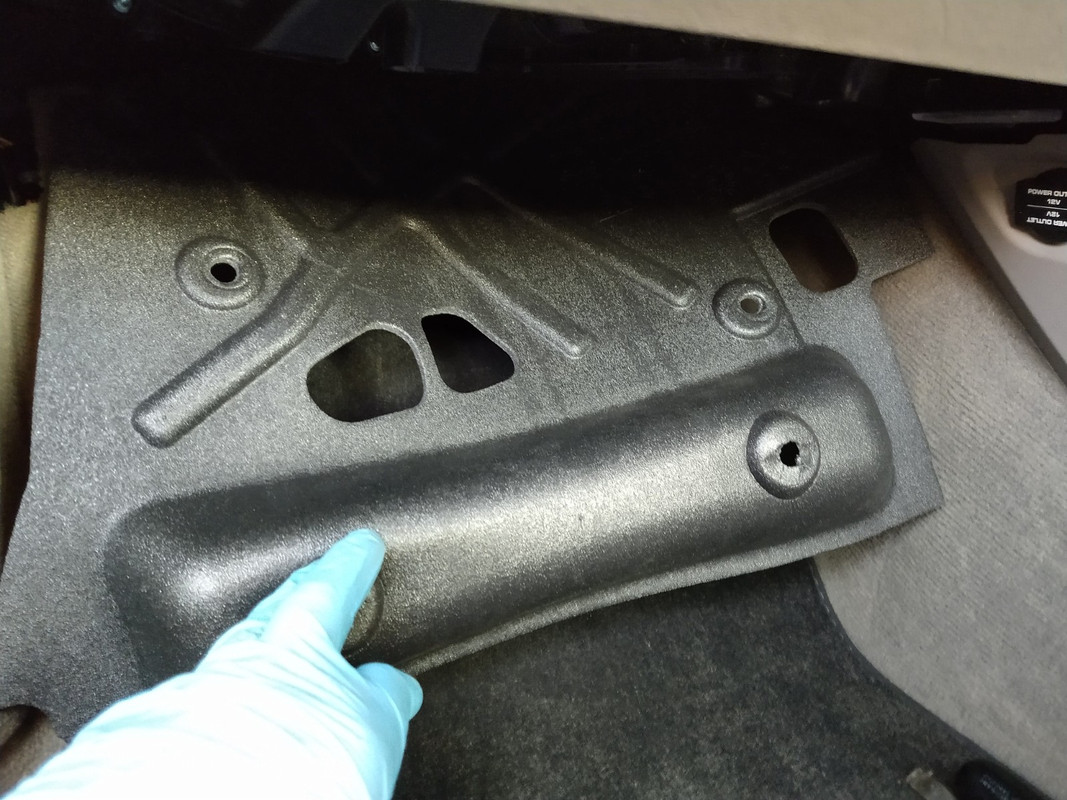
1: Laying beneath the glovebox and looking up, you will see a foam cover, held in place with large black plastic screws.
2: Remove the screws from the front (closest to you) and middle of the foam cover, being careful not to damage them as they are only plastic and finally remove the rear-most screws (you don't actually need to remove the ones by the carpet, as it's possible to carefully bend the foam down out of the way).
3: With the foam out of the way or pressed down, you will see the plastic housing containing the pollen filter. On the left side there are three clips which hold the door closed and the door is hinged on the other side.
4: Simply pop open the three clips on the left and the door will open downwards, at which point the filter will drop down but do not remove it yet!
5: Before removing the filter note the direction of airflow (shown on the bottom of the filter) - the arrow should be pointing towards the hinge.

6: Holding the foam cover down, pull the old filter downwards and out of the filter housing.
7: The replacement filter is Porsche Part No: 991.573.623.00 - MANN Filter Part No: CUK 25 006
8: When fitting the new filter, you will have feed the leading back edge of the new filter into the filter housing first (ensuring you have the airflow direction correct, with the arrow pointing towards the hinge) before getting the rest of the filter into place. Be careful but don't worry too much if you have to squash the filter a little, it will pop back into place when it's in the housing.
9) Finally, refit the door on the housing, refit the foam cover with the plastic screws, being sure to press the foam back into place around the courtesy light surround etc
Job done!! :thumb:
Best Prices
The best prices I found for OEM quality filters were from Autodoc in Germany:
Filter One
Porsche Part No: 991.572.371.00 - MANN Filter Part No: CU 30 004
at £9.04 incl VAT, instead of £12 - 25 elsewhere!
https://www.autodoc.co.uk/mann-filter/7015659?search=MANN-FILTER%20Filter,%20interior%20air%20%20(CU%2030%20004)
Filter Two
Porsche Part No: 991.573.623.00 - MANN Filter Part No: CUK 25 006
at £31.46 incl VAT, instead of £70 - 90 elsewhere!!
https://www.autodoc.co.uk/mann-filter/7004853?search=MANN-FILTER%20Filter,%20interior%20air%20%20(CUK%2025%20006)
In fact, the price of both filters, including delivery from Autodoc in Berlin, came to less than the price of the pollen filter alone in the UK.
Hope that helps
PS: A massive THANKS to my good friend Peter, for getting into the passenger footwell to fit the new pollen filter, saving my back and crumbly bones - cheers mate!! :thumb:
Having returned from our epic Highland adventure, I noticed that despite cleaning the windows before coming home, a film was beginning to form again on the inside of the windscreen.
Whenever this starts to happen more frequently, I think it's always worth checking whether the cabin/pollen filters are blocked and sure enough the cabin filter (located in the boot) looked in need of a change.
It's a pretty easy DIY job, not something you need to head to a dealer for, so you can save yourself money on labour/parts.
Anyway, here's a how-to guide and some info on where you can buy the parts at a good price:
Filter One
Filter one is fitted in the front, beneath the battery compartment cover. You don't need any tools for this - just a clean cloth and a vacuum, to remove any dirt/debris.
1: Open the boot and remove the battery cover by carefully lifting the cover and pulling upwards on the two recesses (see arrows) - slide the cover forwards slightly and you will see that it's located at the back edge on two yellow supports (when you refit, slide the cover back into place on these supports first before you press down the front and you will hear it click back into place).
2: On RHD cars the airbox for the heater is located on the back right-hand side - to the right of the battery.
3: The top is held in place by plastic clips, working from front to back, simply push the head of each clip away from the centre of the top (right or left) with one hand, whilst lifting the top slightly with the other. You don't need to remove the top completely, as the filter can be removed with the top of the housing just lifted at the front.
4: The filter sits in some plastic slides/grooves and forms a 90 degree angle within the filter housing and can be removed by simply lifting at the front and sliding out. NOTE: Before removing completely, note that with the wording printed on the filter there is an ARROW, which shows the direction of airflow - the TIP of the ARROW should be pointing towards the BACK of the filter housing and the TOP of the printed filter lettering should be towards the FRONT of the car.
If you replace your filter with a Porsche item this should be the same when refitting but if you use an OEM equivalent there may be no arrow, just the lettering.
5: The replacement filter is Porsche Part No: 991.572.371.00 - MANN Filter Part No: CU 30 004 - the OEM MANN filter is exactly the same, as you can see.
6: Old and New filters.
7: Before fitting the new filter, wipe clean the inside of the airbox and vacuum out any dust/debris from beneath the airbox, which might clog the new filter.
8: With the top of the lettering on the new filter facing the front of the car (as explained earlier), slide the filter down carefully into the slides in the airbox - pushing it all the way home until the back of the filter reaches the back of the airbox (this will concertina the filter slightly, so you may need to hold the back of the filter in place with one hand, whilst pulling the top of the filter back up a bit at the front, so it covers all the opening in the airbox).
9: Refit the lid of the airbox and battery cover, as described above. Despite the explanation here, it's a 5 - 10 minute job in reality.
One down, one to go
Filter Two
The second (activated carbon) filter is fitted in the passenger side footwell, behind the glovebox. For this you will need a torch and a stubby, large head (wide), slot type (straight) screwdriver OR a 90 degree screwdriver or wide screwdriver bit/ratchet, as for some of the screws there's not enough space to use a full-size screwdriver.
1: Laying beneath the glovebox and looking up, you will see a foam cover, held in place with large black plastic screws.
2: Remove the screws from the front (closest to you) and middle of the foam cover, being careful not to damage them as they are only plastic and finally remove the rear-most screws (you don't actually need to remove the ones by the carpet, as it's possible to carefully bend the foam down out of the way).
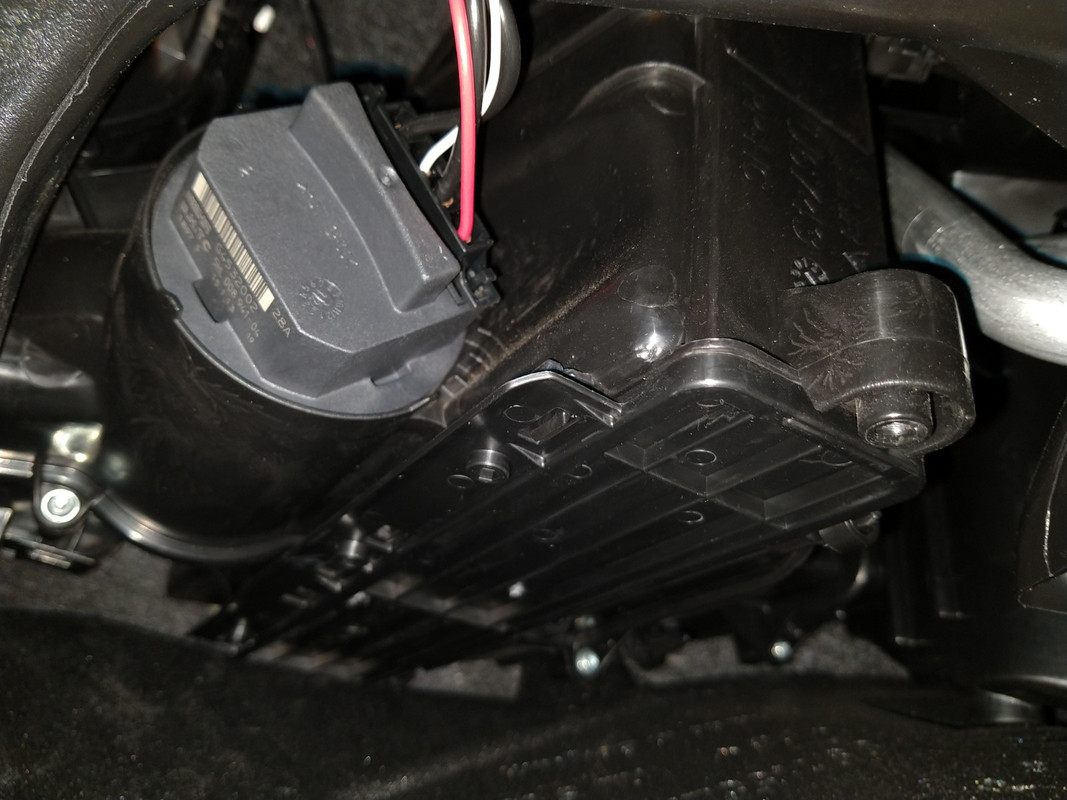
3: With the foam out of the way or pressed down, you will see the plastic housing containing the pollen filter. On the left side there are three clips which hold the door closed and the door is hinged on the other side.
4: Simply pop open the three clips on the left and the door will open downwards, at which point the filter will drop down but do not remove it yet!
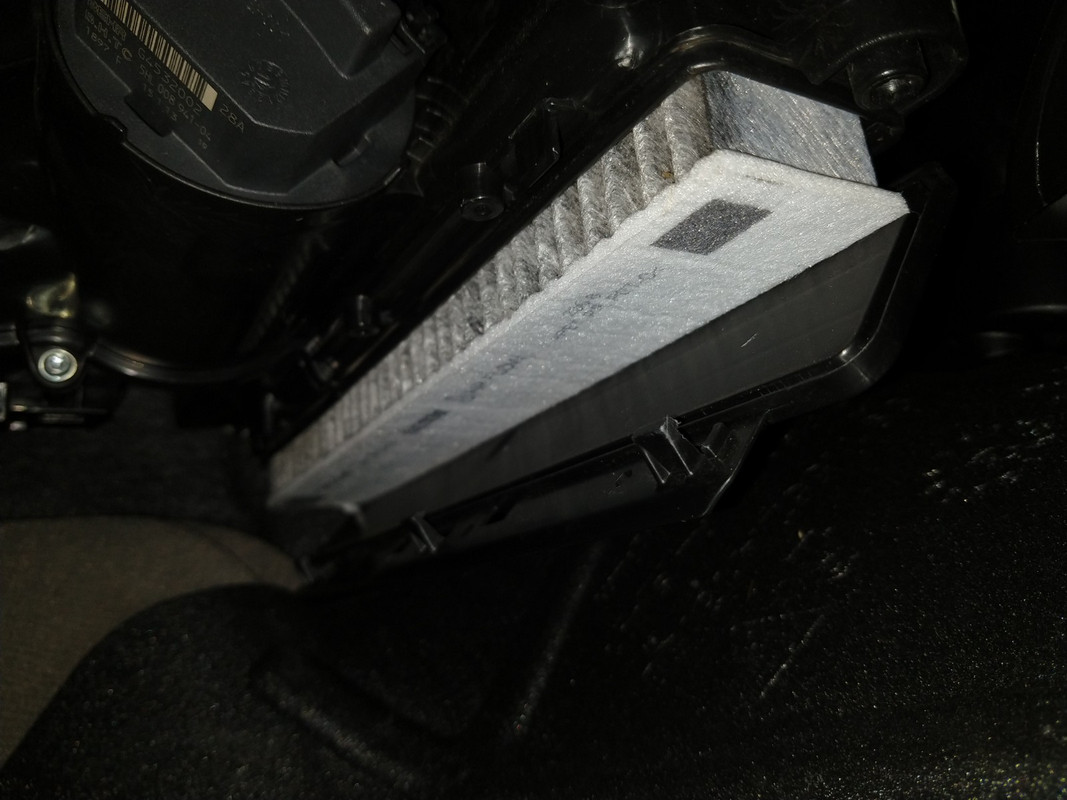
5: Before removing the filter note the direction of airflow (shown on the bottom of the filter) - the arrow should be pointing towards the hinge.
6: Holding the foam cover down, pull the old filter downwards and out of the filter housing.
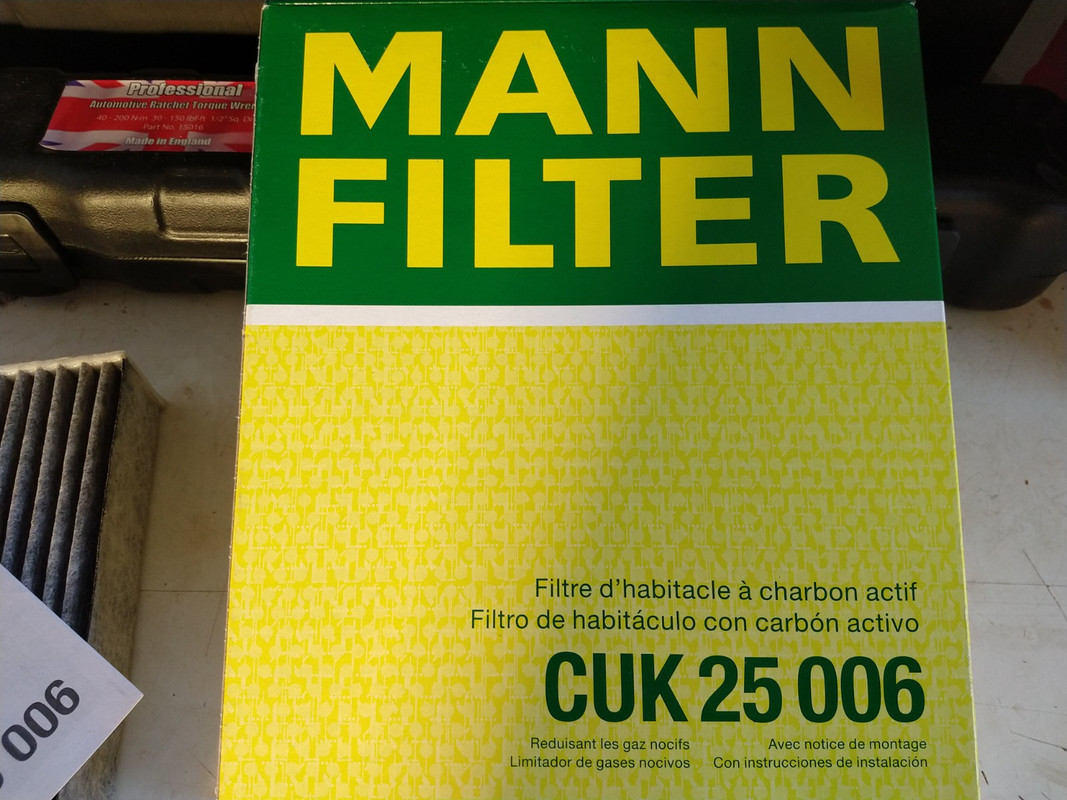
7: The replacement filter is Porsche Part No: 991.573.623.00 - MANN Filter Part No: CUK 25 006
8: When fitting the new filter, you will have feed the leading back edge of the new filter into the filter housing first (ensuring you have the airflow direction correct, with the arrow pointing towards the hinge) before getting the rest of the filter into place. Be careful but don't worry too much if you have to squash the filter a little, it will pop back into place when it's in the housing.
9) Finally, refit the door on the housing, refit the foam cover with the plastic screws, being sure to press the foam back into place around the courtesy light surround etc
Job done!! :thumb:
Best Prices
The best prices I found for OEM quality filters were from Autodoc in Germany:
Filter One
Porsche Part No: 991.572.371.00 - MANN Filter Part No: CU 30 004
at £9.04 incl VAT, instead of £12 - 25 elsewhere!
https://www.autodoc.co.uk/mann-filter/7015659?search=MANN-FILTER%20Filter,%20interior%20air%20%20(CU%2030%20004)
Filter Two
Porsche Part No: 991.573.623.00 - MANN Filter Part No: CUK 25 006
at £31.46 incl VAT, instead of £70 - 90 elsewhere!!
https://www.autodoc.co.uk/mann-filter/7004853?search=MANN-FILTER%20Filter,%20interior%20air%20%20(CUK%2025%20006)
In fact, the price of both filters, including delivery from Autodoc in Berlin, came to less than the price of the pollen filter alone in the UK.
Hope that helps
PS: A massive THANKS to my good friend Peter, for getting into the passenger footwell to fit the new pollen filter, saving my back and crumbly bones - cheers mate!! :thumb:


")


