Porsche 911 UK Enthusiasts Online Community Discussion Forum GB

Welcome to the @Porsche911UK website. Register a free account today to become a member! Sign up is quick and easy, then you can view, participate in topics and posts across the site that covers all things Porsche.

Already registered and looking to recovery your account, select 'login in' and then the 'forget your password' option.

944S 2.5 16v resto then track project

I knew with the Goodwood Charity Track day coming up I actually wanted to get the handling sorted as I assumed it would be set up all over the place as I'd never had the Geo done, it did still handle really good though.

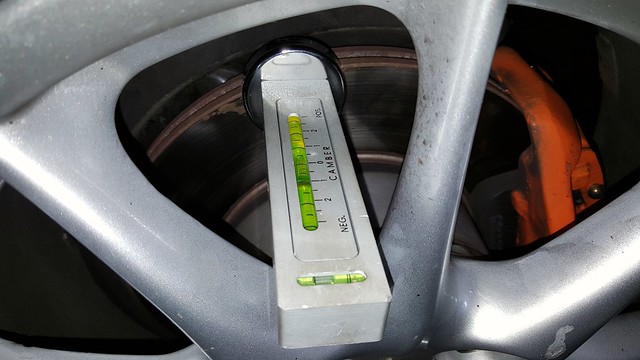
I wanted to try to set it up myself and I knew what cambers I needed from reading others that track their lowered 944's. Negative 1.5 on the front and neg 1 one the rear.

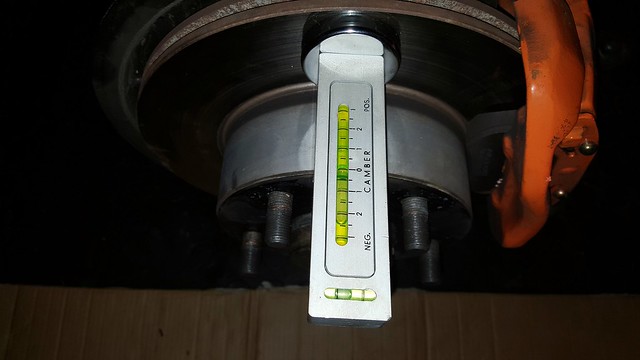
I adjusted the fronts first, this little level tool is put against the flat surface of the disc, through the wheel spokes to measure what you have, then jack up and take the wheel off, adjust it to replicate what you found when it was on the floor and adjust to what you want it to be. I adjusted one side at a time but it didn't take too long with most of the front end suspension being new.

38498230196_d87984f8b6_z.jpg


37838080994_40f3f52211_z.jpg


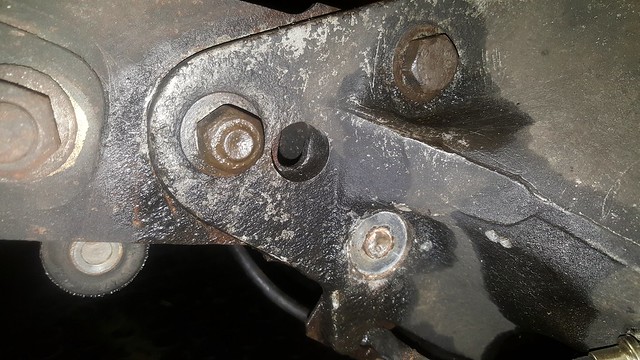
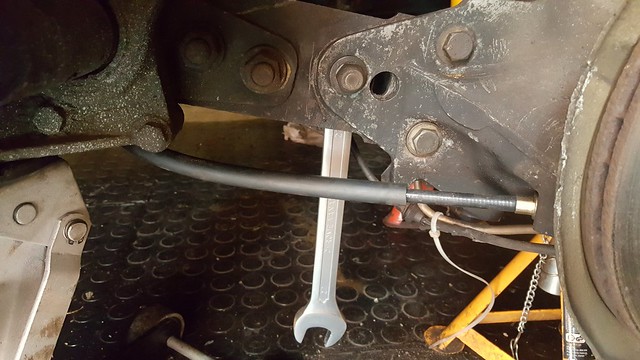
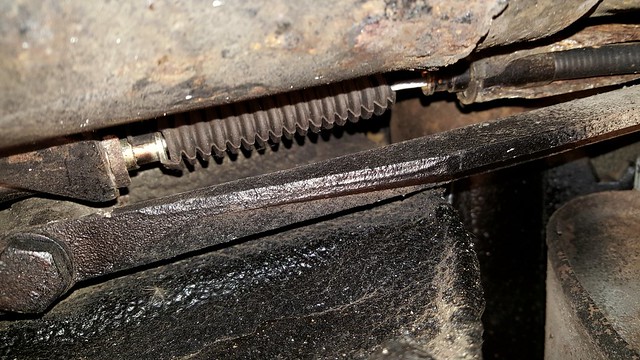
On the rear I found everything that needed undoing very tight and again a pinch bolt decided it was going to snap. I had to drill this out and get a new bolt before carrying on.

26778513449_203f07186a_z.jpg


I had to buy a big 27mm ring spanner to get this to adjust, with the addition of a lump hammer to persuade it to move.

37838086624_2472433184_z.jpg


Once all adjusted i ran the car backwards and forwards to settle the suspension and with it all checked again it was all spot on.


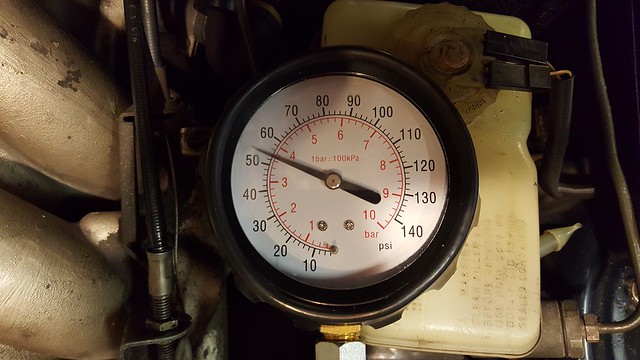
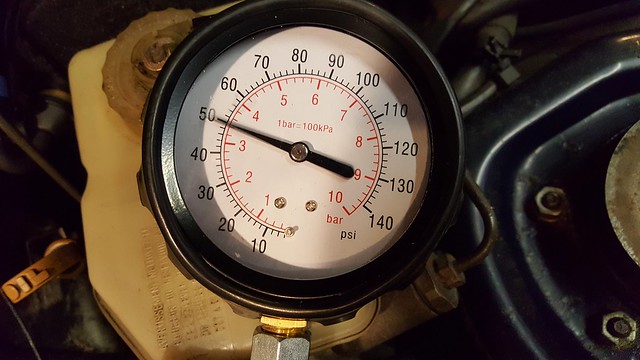
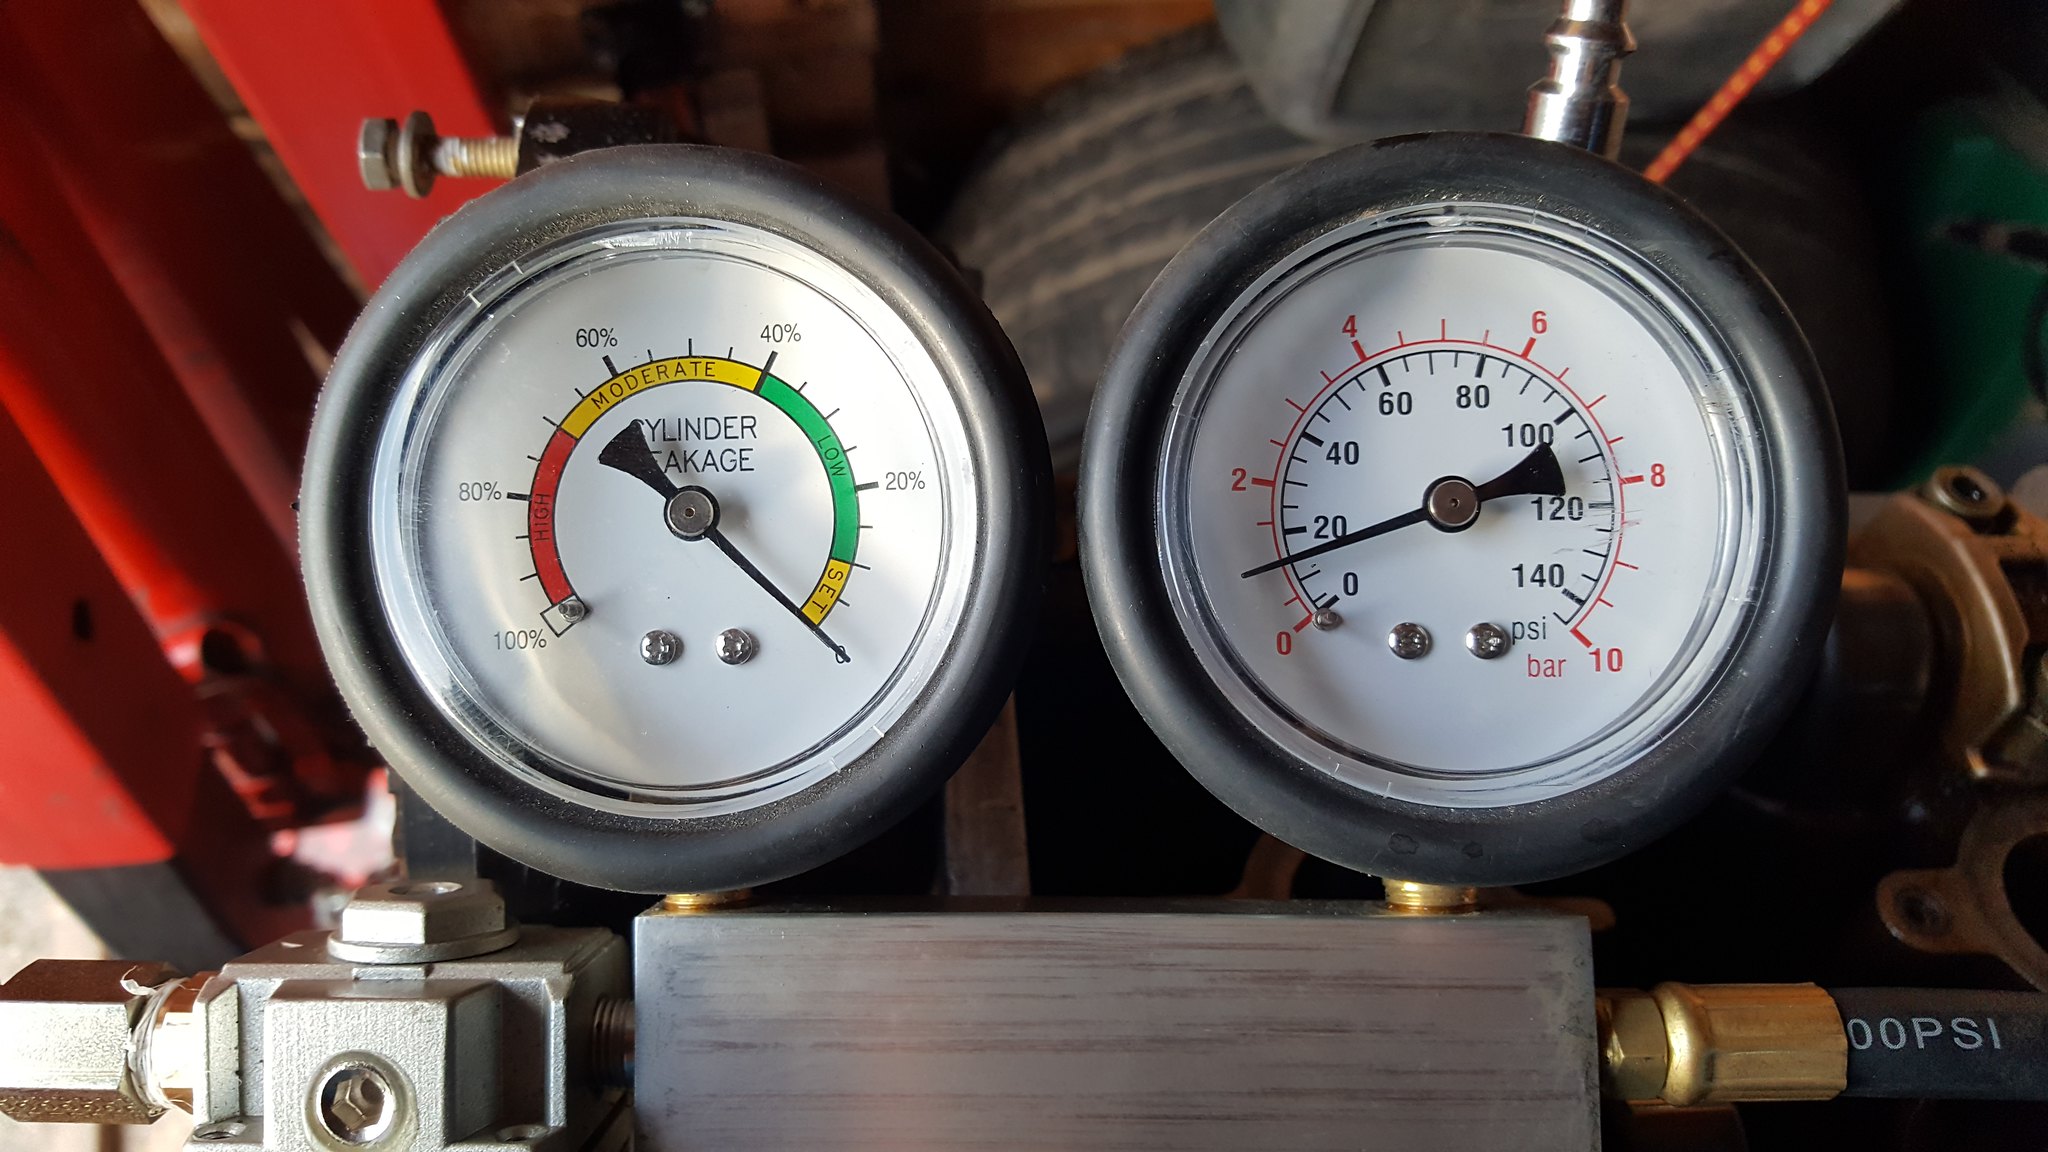
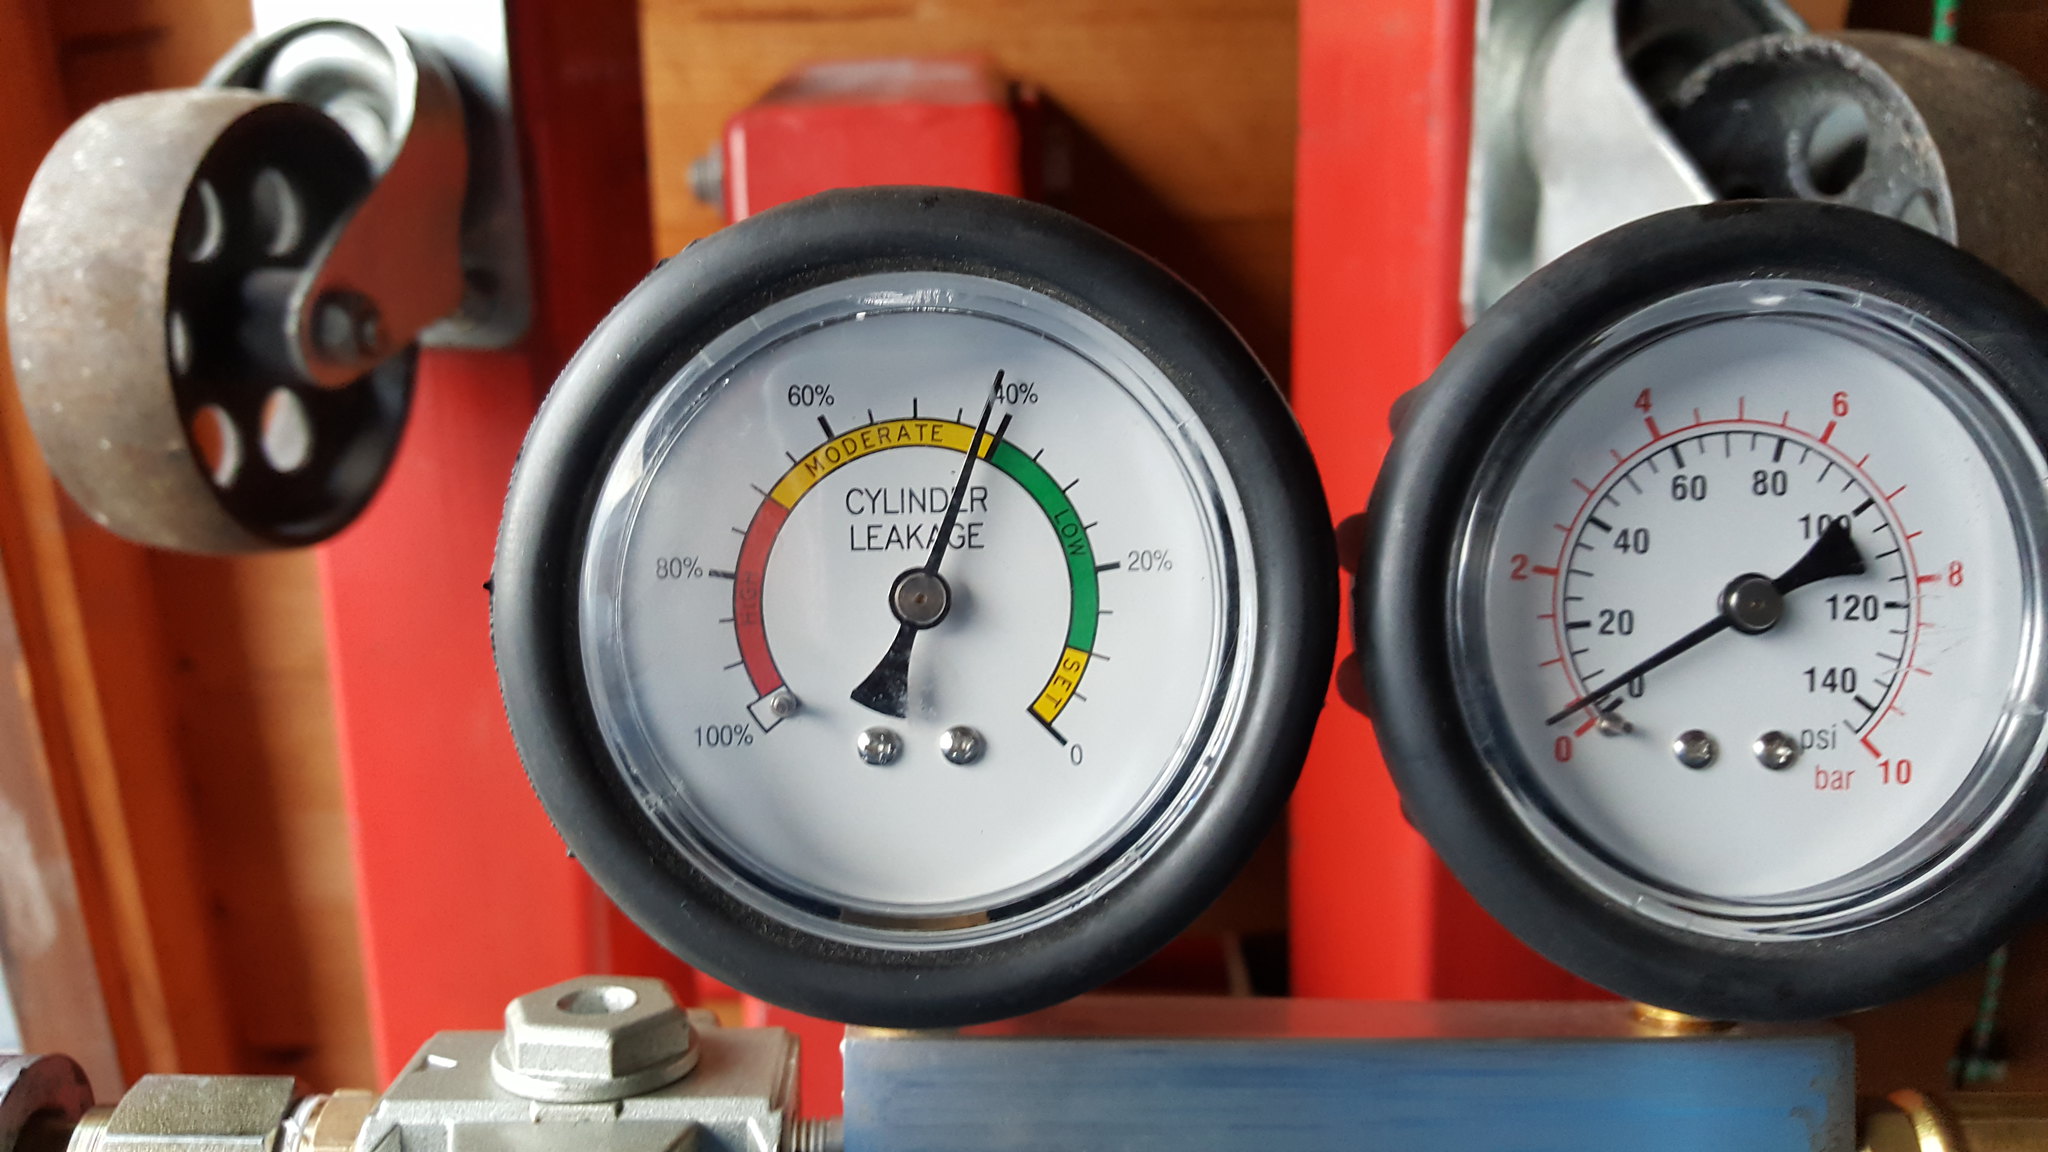
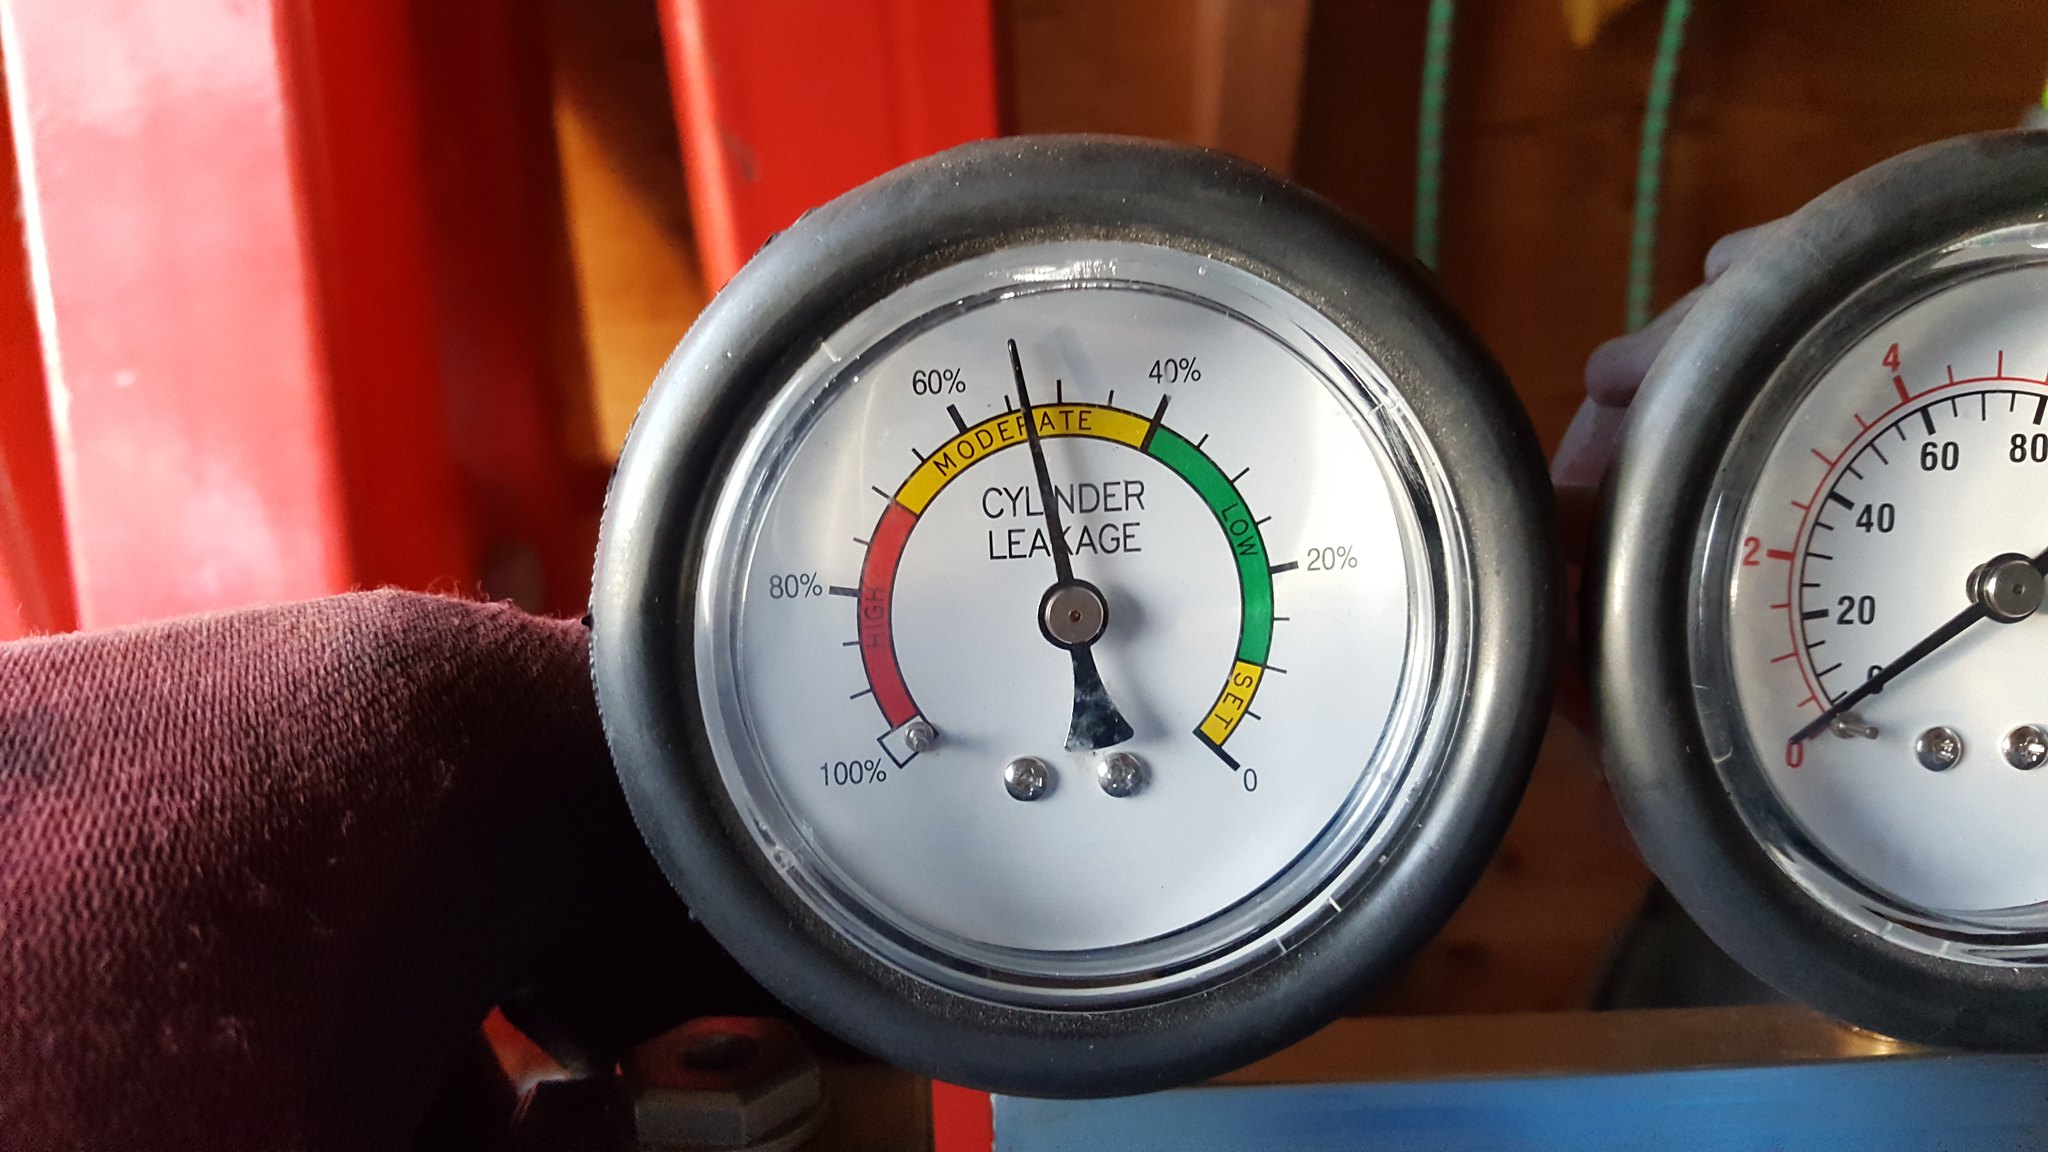
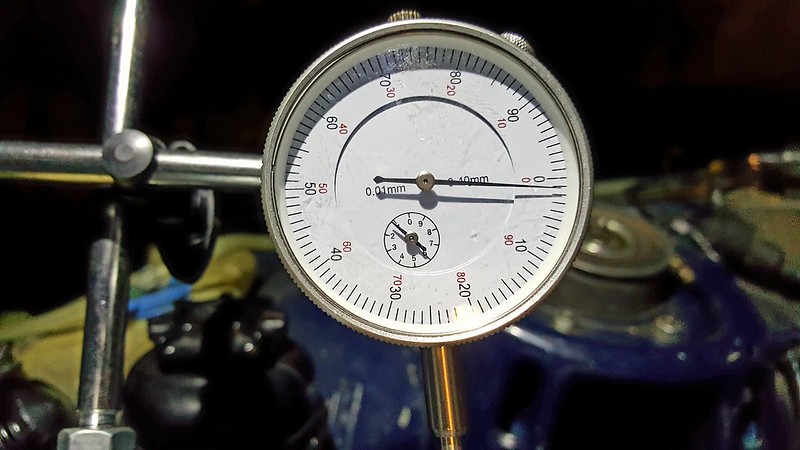
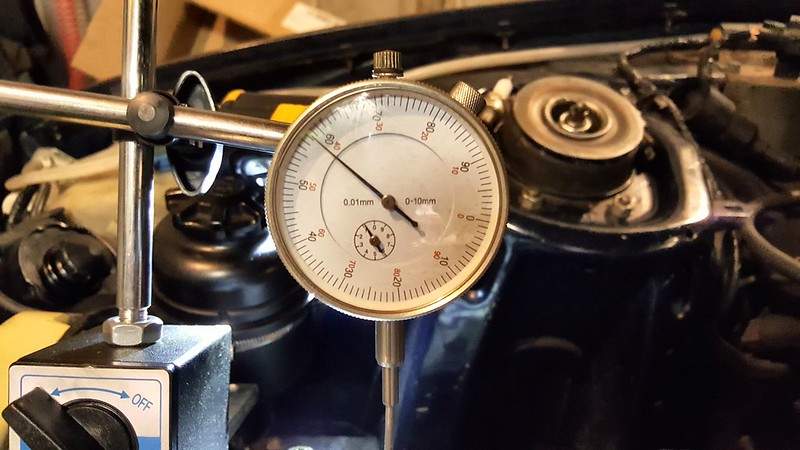
Now that I had put a good few miles on the engine since it's rebuild I wanted to check the compression compared to what it was. The results are quite good across all four cylinders now and for comparison, previously it was;
Cyl 1 150psi,
Cyl 2 172psi,
Cyl 3 174psi'
Cyl 4 184psi.

now I have;
Cyl 1 190psi,
Cyl 2 200psi,
Cyl 3 198psi.
Cyl 4 205psi.


Before I hit Goodwood I wanted to try a performance chip and settled on a Accell one, reviews were as good as any and it was reasonably priced. This made a lot of difference in the whole rev range and it seemed to also start quicker and tickover smoother. Looking forward to a rolling road session.

37666736855_128f0c34af_z.jpg


I also needed to get the handbrake working better as it only just scraped through it MOT last year and that was due again.

I bought a new handbrake cable and fitted it a few days before I was due to MOT it. Even with the new cable it still didn't adjust correctly and the off side was only just biting. Luckily again it was just enough to pass but I would like to get it sorted once and for all.
I have a feeling the cam in the middle of the cable isn't pulling enough pressure for the O/S brake but still unsure?

38498235236_9ce55fbf0c_z.jpg


I'm wondering if the cam that puts pressure on the off side isn't set up correct but no matter what I do I can't get really good grip on that side?

It did pass its MOT the day before driving to Goodwood and I got up early that next morning to head down there, it ran faultless all the way.

While on track I got a couple of little hiccups that seemed like it was fuel related but this gradually got worse up in the higher regions of the rev range so I quit after a few sessions.

The car did feel a lot quicker than it was previously though and I was knocking off 8-12 seconds a lap from last years track day. It obviously handled better which would help but the power was huge in comparison, I was pleasantly surprised.

38558416322_e6936fb9e9_z.jpg


On my way home it spluttered again, only once but I got home fine and put it into the garage for a few weeks before trying to find out what this issue was.
 
So deciding to get to the heart of the running problem that I thought was a fuelling issue but could have been vacuum related but that all checked out when I inspected all the vacuum pipes.

I bought a fuel pressure test gauge that checks pressure in the system and at the pump and using the expected values from Clark Garage I had a reference point.

24546392288_04f5851b9c_z.jpg


I set up the gauge and measured the pump pressure with engine off first by jumping the DME relay to run the pump with the engine off, that tuned out to be fine and giving good pressure.

38361761556_fd7f5e121f_z.jpg


Next was fuel pressure at the rail when the engine is running, again this was within range.

38361754056_e90755e820_z.jpg


The pressure leakdown test was last, leaving the engine off see how much pressure in the fuel rail is lost over a 20 minute period, nothing was lost on this test so all in all the fuel delivery system seems to be spot on.

I wasn't happy with the knock sensor wiring as the wire was exposed on the corner and the rubber boot split on both.

38577818442_f9bf6bc5fb_z.jpg


and will also fix the knock sensors while its in bits, I bought replacement connectors for both and will solder new wiring in and fit these new connector kits.

26793786319_da1fb65970_z.jpg


and one other possible culprit was the crank sensor distance from the flywheel so I started stripping the induction system down to get to the sensor as this could be fitted slightly off and cause issues.

But while stripping everything down to get to the knock sensors and crank sensor I found the rubber connector between the throttle body and intake J tube was split, I thought I had just caused this with removing it but on further investigation I noticed wet oil residue in the crack and deduced this has been like this for a while and could actually be my issue.

38538596832_6ed1012051_z.jpg


24698159928_0b8865070d_z.jpg


I will still check the crank sensor clearance and fix the knock sensor wiring but I feel the hose is the culprit, I will have to wait for a few days before finding out though as the hose is on back order from Germany and is not due until mid week.
 
I had been wondering about power upgrades and had come across an 3.0 S2 engine on ebay in need of a rebuild and put a cheeky bid in of £300 which happened to be the owners reserve price and no one else bid on it, so I got it, I thought okay what now? My current 2.5 engine is running sweet since the rebuild 12 months ago and seems to be giving great power but this may mean I can retire this engine and put it back in when I get around to selling the car.

I always relish an engine rebuild but this engine wasn't really needed in my life but looking at used S2 engines and the prices of engine parts I thought even if it was not a viable repair the engine parts alone would double my money back.

I was told it had done 160,000 miles and was only smoking on heavy acceleration and was also knocking, suspected balance shaft bearing? I wanted to diagnose as much as possible before pulling it apart to give me more of a clue as to the issues that lay ahead. I hadn't heard it running so could only believe what I had been told.

I would have liked to do a compression test but not being able to turn the engine over scuppered that plan, I pulled the plugs and took the cam cover off, the plugs were a little dark but even in colour, the cams look in good condition and the inside of the top end looks nice.

I have a leak down tester but have never used it as the compressor fittings were different, I bought some correct fittings and as this test doesn't require the engine to be spinning and in reality is a better test than a compression check as it pinpoits the exact issues in the compression stroke.

I started off by calibrating the tester by zero setting it while hooked up to the compressor but not the engine yet. Each cylinder in turn get set to TDC.

39375105484_f72622526b_k.jpg


Then using the pipe to the engine just hook up to run the test.

40086611281_fc7af74cf1_k.jpg


Cylinder 1

39375186444_8f8f20358a_k.jpg


Cylinder 2

40053678862_606c1de289_k.jpg


Cylinder 3

40053650092_3e2af81949_k.jpg


Cylinder 4

39375117364_7375846b79_k.jpg


I could hear air leaking from the crankcase in all four cylinders but when I got to cylinder 4 I could also hear air from the intake valves. I fired some WD40 in the inlet ports and you could see the bubbles coming from the valve seats.


I set the engine to TDC on Cylinder 1, marked up the belts and will now start to tear down the engine.

39187583815_089892907f_k.jpg


Hopefully it will just be a case of, valves need lapping in and new rings but I have been here with my S engine and the bore was shot. Hopefully pulling the head off will reveal all and fingers crossed it'll be just main bearings as the culprit for the knocking as I checked the balance shafts and they are both tight and not in the least worn.

I have currently got the engine in my largest shed, out of the way, as I need the space in the garage for the new rear discs and handbrake shoes I need to fit in the coming week, plus the 996 needs to go in there afterwards.
 
:worship:

Can you not bore it out to 3.4? :lol:
 
Your gaff must look like an allotment with all those sheds our Chris!

Yet more engine shernanagans. I like the increase in capacity and 300 squeelerz is nothing for that. Good effort that man!
 
Once it's in bits I'll make the decision of what to do, if it's to go in the S there'll be another load parts to buy, inlet, throttle body, ECU etc adding to the cost but if is worthwhile I may pop it in there for the extra horses?
 
wasz said:
Love it.

I always regret passing up a nice 944 s2 and a 968 sport that I passed up in 2009.

The 3.0 is a peach, the largest power output per litre engine of its day?

Not by a long way I would think. I believe it was the largest capacity 4 cylinder production engine though.

MC
 
Another couple of weekends of work getting ready for the RS Day at Oulton.

Back to the engine that's in the car. I have kept meaning to get the valve timing sorted since I rebuilt the 2.5 engine but the quote I got for the couple of hours work was extortionate so I read up and bought a dial gauge for £20 (£300 saved from having someone else do the work).

The dial gauge I bought has a switched magnetic base so I also needed some solid base for it to attach to. I rigged up a steel plate across the head once the cam cover was off.

25709066007_3e23eb83d7_c.jpg


With the dial gauge in place I needed to extend the probe from the gauge as the one that comes with it is far too short, I used a piece of thick wire I had, threaded the end and bent it at the inlet tappet end to make a foot.

25709114057_66689d1f76_c.jpg


26707898888_0dc55baab1_c.jpg


The needle on the gauge runs backwards as cylinder one inlet tappet drops to open the inlet valves so you have to put a couple of MM preload on the gauge and then set the dial to zero.

40537380162_f9c1f79bc6_c.jpg


Each full rotation of the dial is 1mm and I needed to get my valve timing set at 1.4mm for the 2.5 16v engine, this took me to 0.6mm, after this I ended up at the position shown on the gauge.

39685015795_f2718a0082_c.jpg


This whole procedure means when cylinder 4 is at TDC on its compression stroke, cylinder 1 is opening it's inlet valves and this is the 1.4mm valve lift figure you are looking for. Its adjusted when you get the lift required by locking the cam pulley at this position.

The settings are confirmed by rotating the engine a few times to check the gauge goes from zero at TDC and back to 1.4mm again, I did this a couple of times to double check.

All buttoned back up and fired the engine up which so far seems a bit smoother than previously, although I haven't run it on the road yet.
 
I also wanted to get the handbrake fixed once and for all, I had discs and shoes already bought to fit and the cable was recently replaced. This handbrake has had so many MOT fails and advisories in its life it was time for it to get sorted out.

I removed the rear discs and when stripping the fitting kit off I saw some parts didn't match on each side, there were various sized springs and pins, bit of a bodge of parts. Need to source a few parts before putting it all back together.

39869006924_07bd0a74ce_c.jpg


I also had to drill the shoes to accept the spring pins, for some reason these weren't exactly right but easily remedied.

40537287102_d16486fb79_c.jpg


A bit more meat on the new shoes so this should help a little.

39684923935_561bf89dfa_c.jpg


The new rear discs got the bells painted before they go onto the car.

26709529398_51f158cde3_c.jpg
 
wasz said:
What did you paint the bells with? Got to do my new discs, I just have some primer and silver wheel paint
I use Halfords brushable grey primer and it looks perfect with no brush marks.
 

Forum statistics

Threads
124,605
Messages
1,442,014
Members
49,037
Latest member
PC Saros
Back
Top