

MisterCorn
Fuji
- Joined
- 8 Jan 2011
- Messages
- 9,411
As a lot of people have found out, the standard exhaust on the 996 C2 isn't as loud as some might like. A common fix for this is the 'Gundo hack' which involves bypassing part of the silencers, this makes the car louder all of the time. The Porsche solution is the PSE or Porsche Sports Exhaust. This is a switchable exhaust which can be set to the loud or quite mode using a switch in the car. I wasn't particularly looking for one, but one came up for sale on the forum as a complete system.
I searched on the internet to find details of the fitment for this but couldn't find a decent reference so I thought I would write this up for anybody interested. I will split it up in to three parts:
1. Removing the old exhaust and fitting the new one
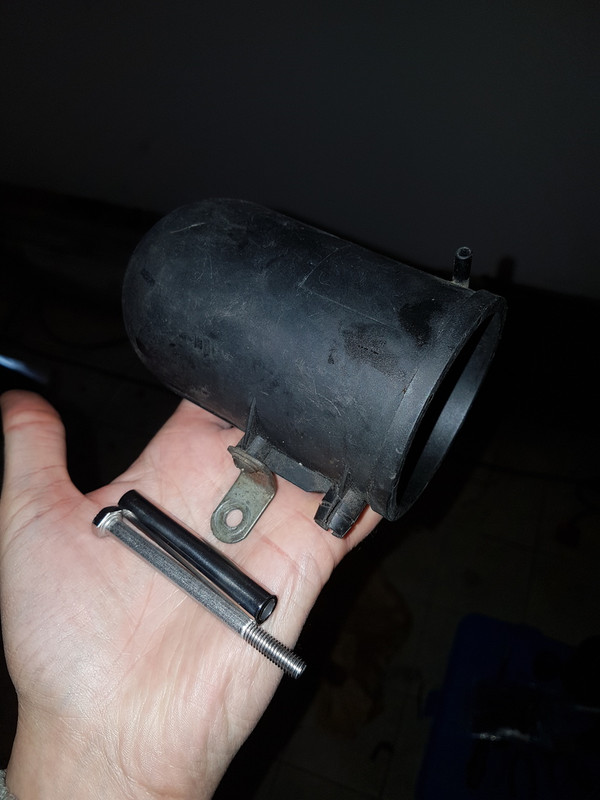
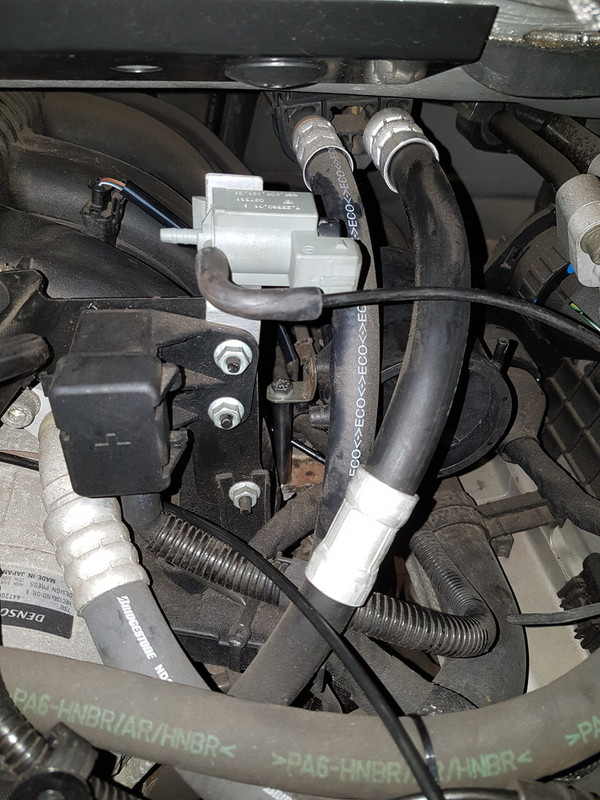
2. Fitting the vacuum tank / solenoid / vacuum pipes
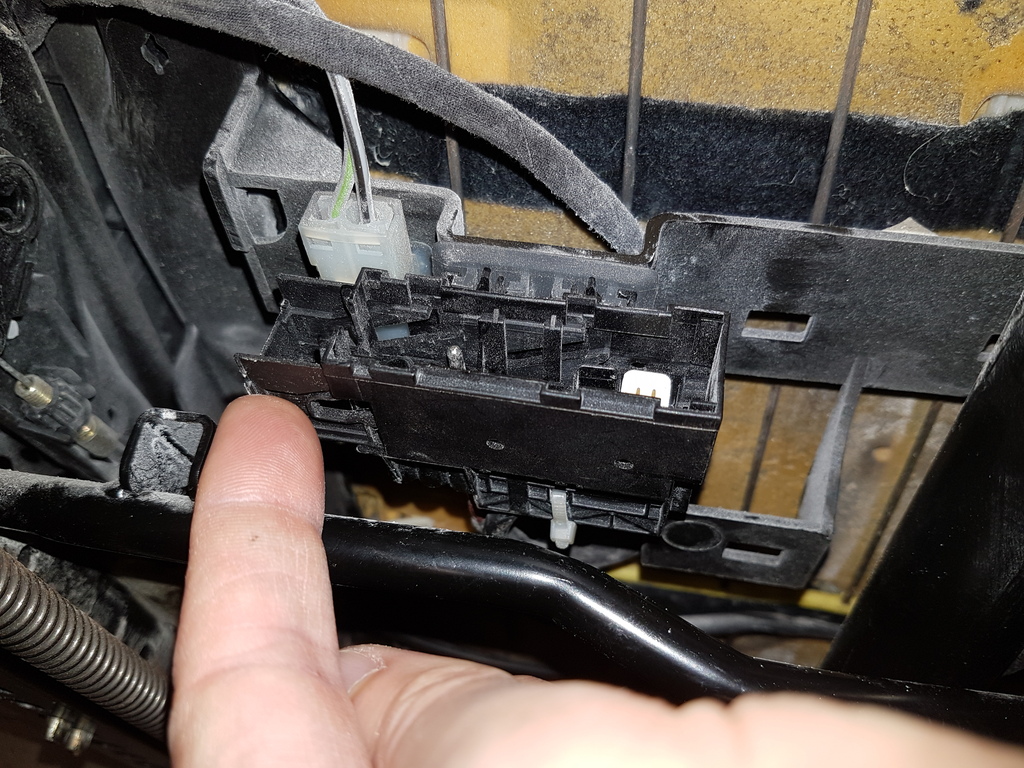
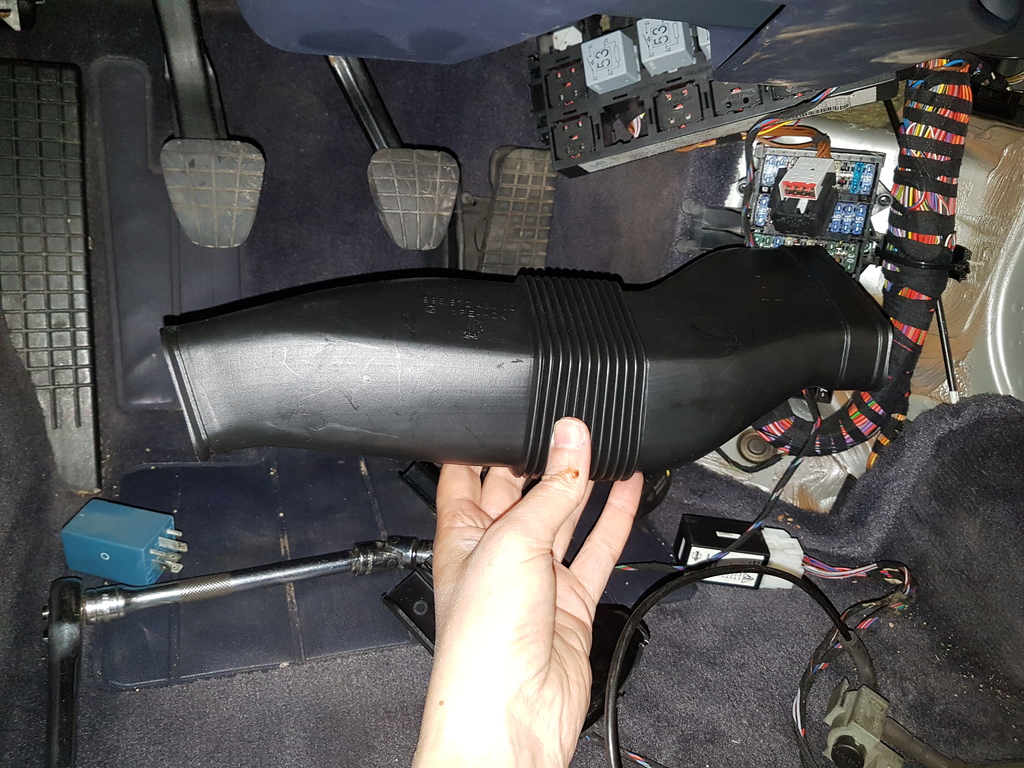
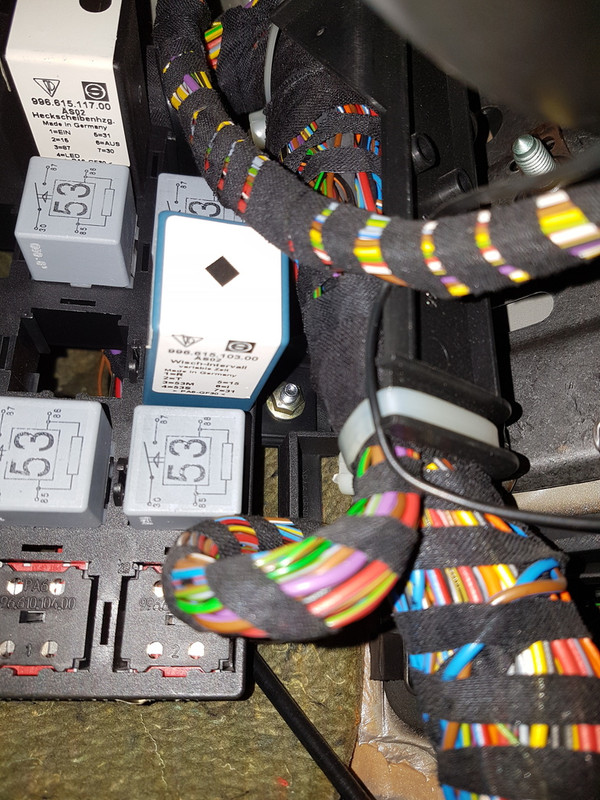
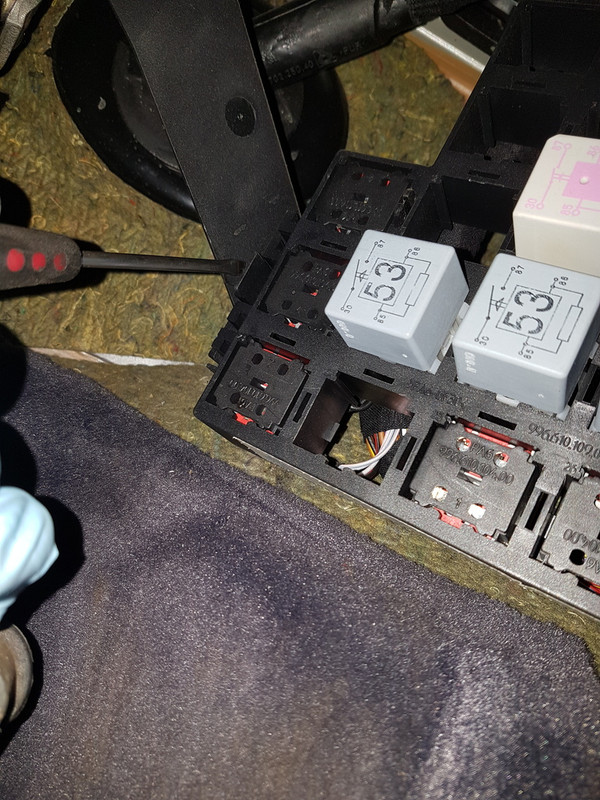
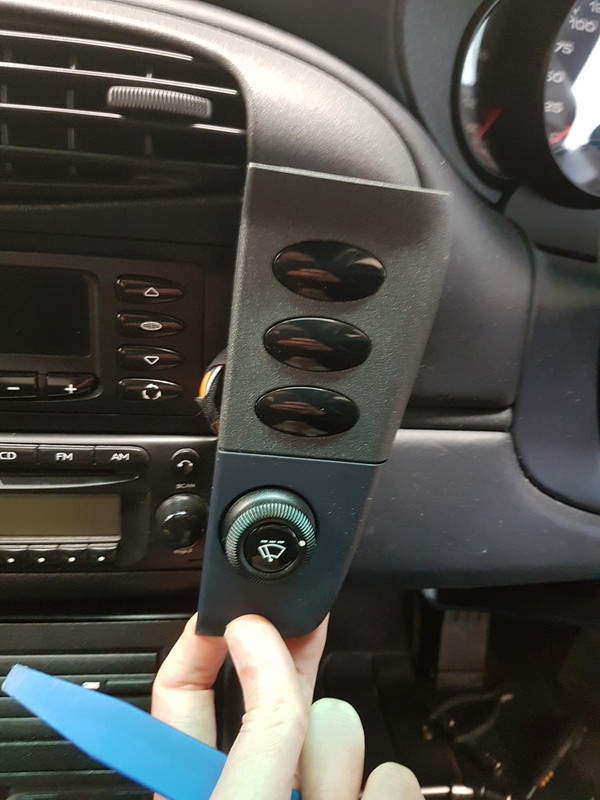
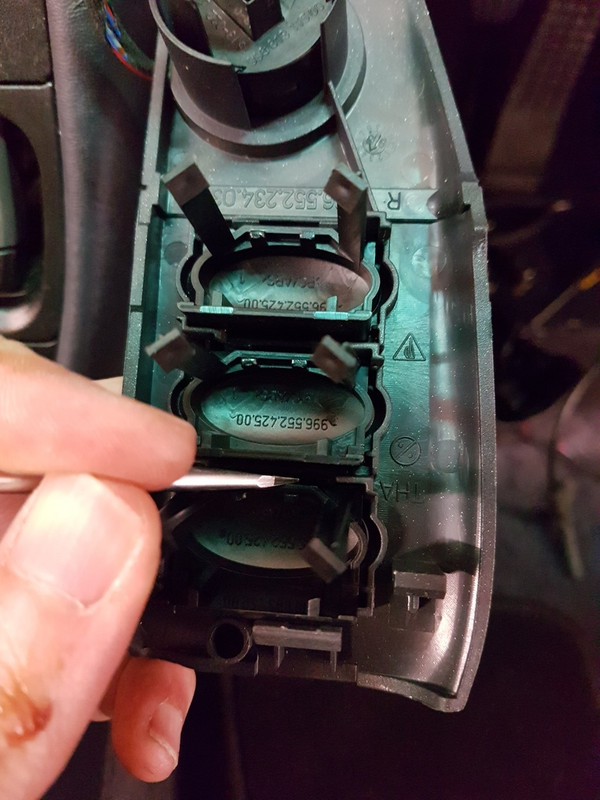
3. Fitting the switch and relay
The instructions for this are covered in a Porsche TSB, whilst the data is all there, there is little detail so this a more expansive version. It is intended to be read in conjunction with the TSB. If you can't find it online let me know and I'll send you a copy.
Put the key in the ignition in position 1, release the boot and the bonnet and then disconnect the battery by removing the earth lead, place it where it can't accidentally touch the battery. Loosen the rear wheel nuts and then jack the car up.
Remove the rear bumper, at the back of the engine compartment is a strip with 4 screws on it, undo these and take the strip off.
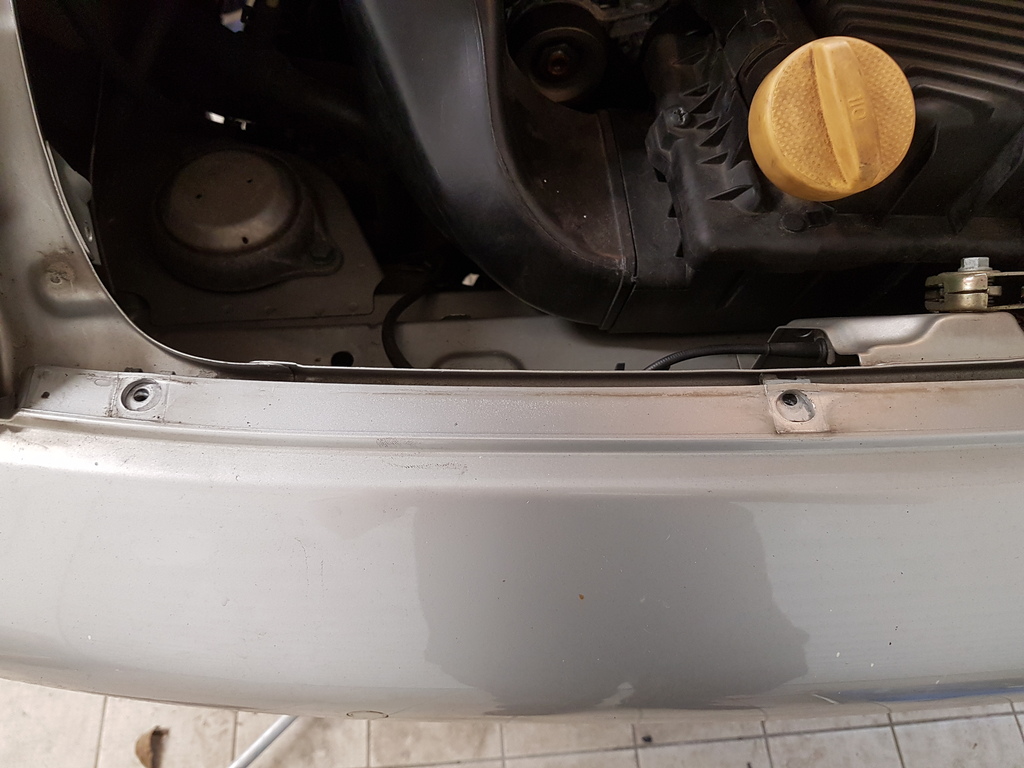
At the front edge of the bumper is a screw at the top and three along the bottom, remove these.
There are another couple of screws underneath the bumper at the back, remove these.
With the help of an assistant, ease the front edge of the bumper out and then pull it backwards. Be careful to remove connectors for the number plate light and parking sensors (if present)
Remove the covers which are over the silencers, these are held on with four nuts along the top and one inside the wheel arch.
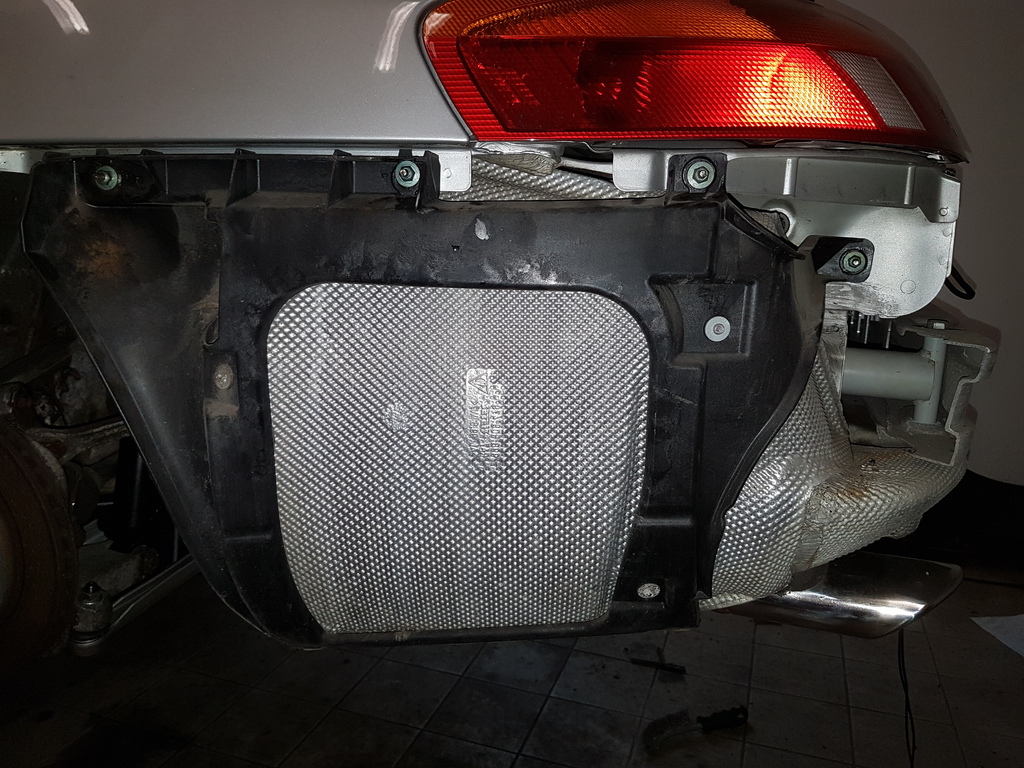
The front nuts on the outside edge of mine were corroded on both sides. There isn't much height on the nuts and they rounded off very easily. To remove them I had to resort to using a dremel to cut the sides off the nuts to weaken them and then drive them around with a hammer and chisel. I changed all the nuts and put grease on them when refitting them (photos above are with new nuts)
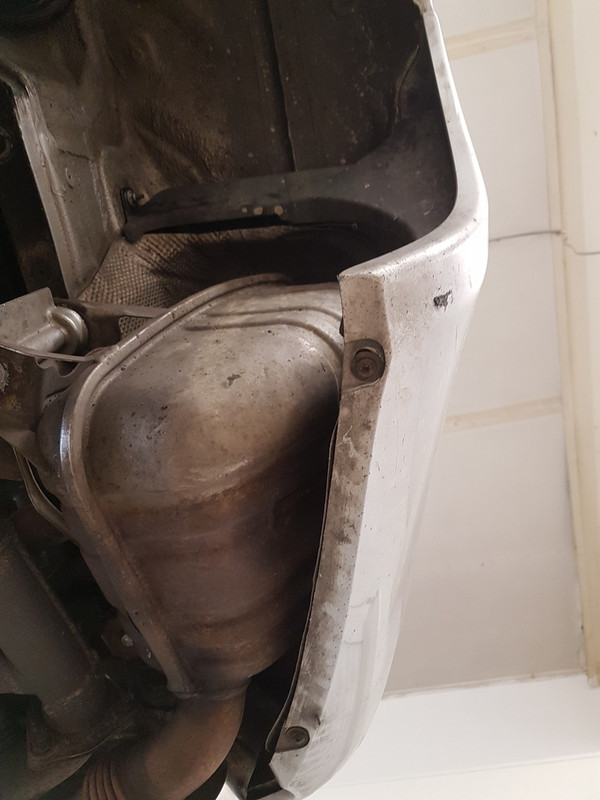
Remove the aluminium bumper. There is a single bolt each side to remove this, it comes off along with some heat resistant material.
The silencers can now be removed. Undo the clamps at the bottom where the entrance to the silencer attaches to the outlet from the catalyst.
.jpg)
The tips can also be removed at this point.
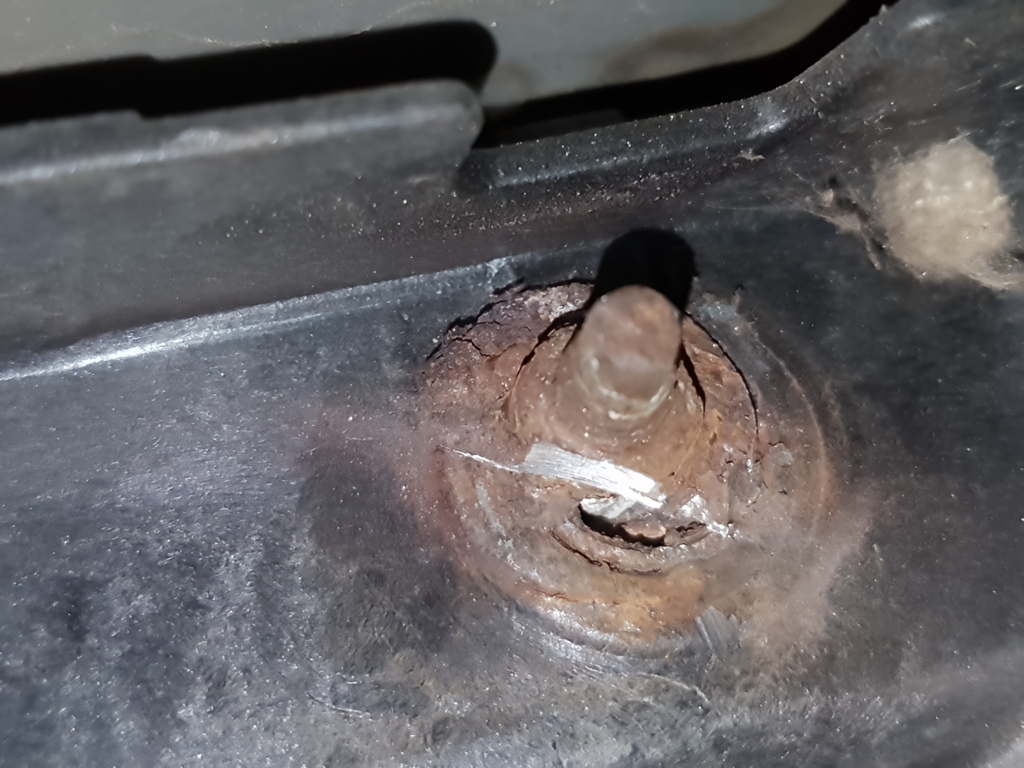
The silencers are held on with a long bolt at the front and a short bolt at the rear, these run vertically up through a mount. Undo both of these and remove the bolts. The silencers can now be removed from the car.
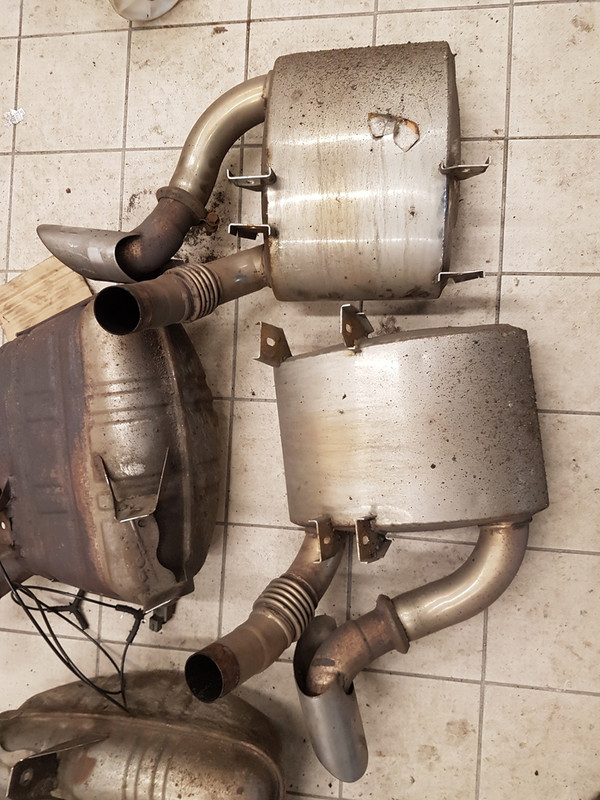
Here you can see the two silencers with the mounting brackets clearly visible.
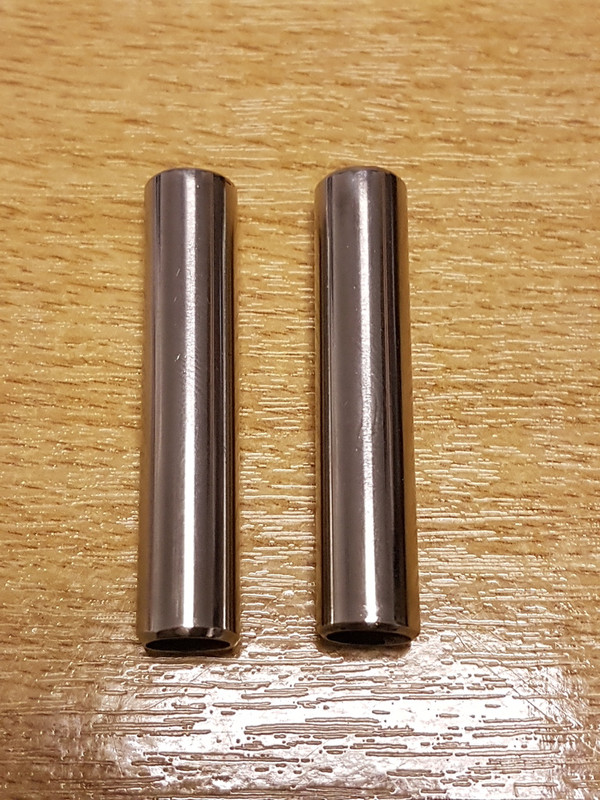
The PSE silencers can now be fitted. The brackets on to which the silencers fit have a tube inside them, an 8mm bolt runs through this tube and through the anti-vibration mounts at the top and bottom of the mounts. On my car the tubes were missing front and rear, the long bolt had been replaced by a 10mm bolt and at the rear the short bolts had been kept at 8mm. Due to not having any tubes the bolts had picked up on the anti-vibration mounts and it made one of the rear bolts an abosolute pig to remove. The tubes are available from Porsche, I had bought the long ones for something like £18 each before realising they were nothing more than thinwall tubing. I made the rear ones myself from 1mm wall 10mm OD stainless tubing.
I bought new stainless steel nut, bolts, and washers and then fitted the PSE silencers
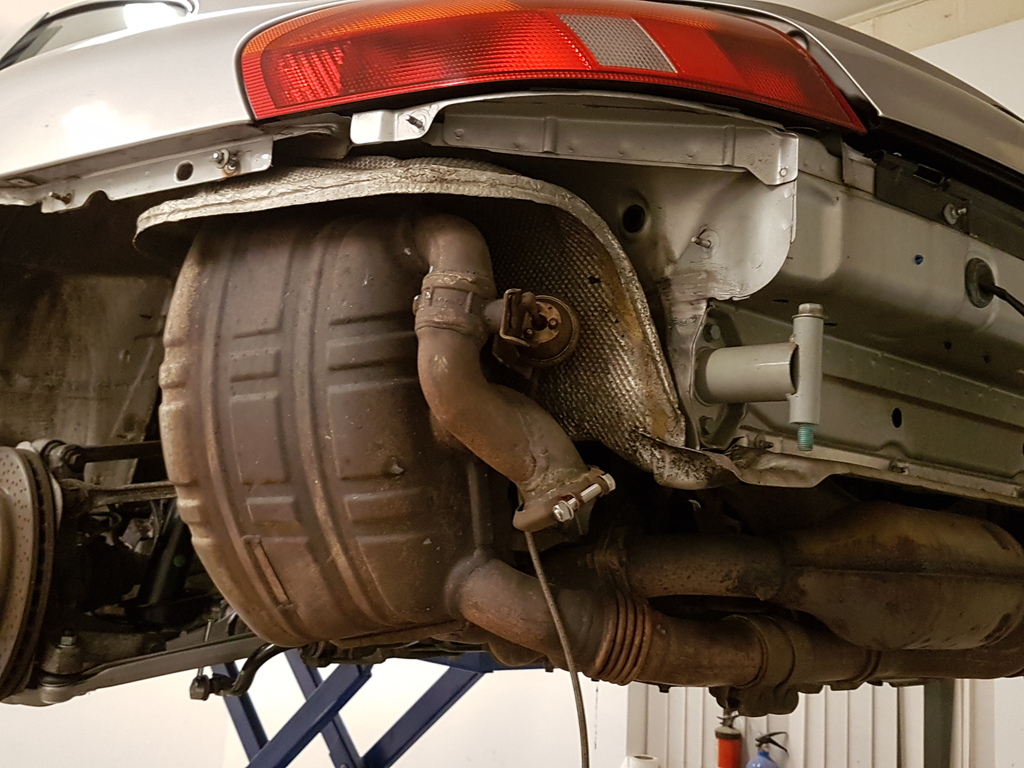
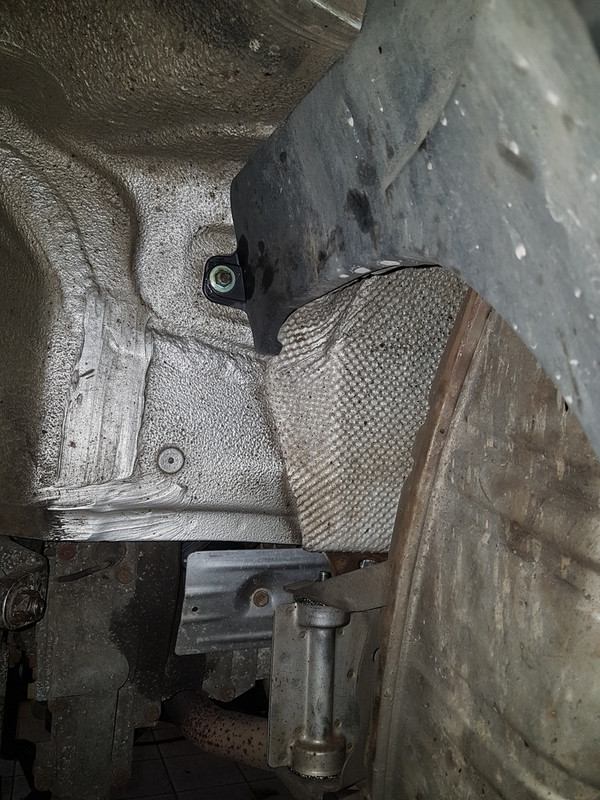
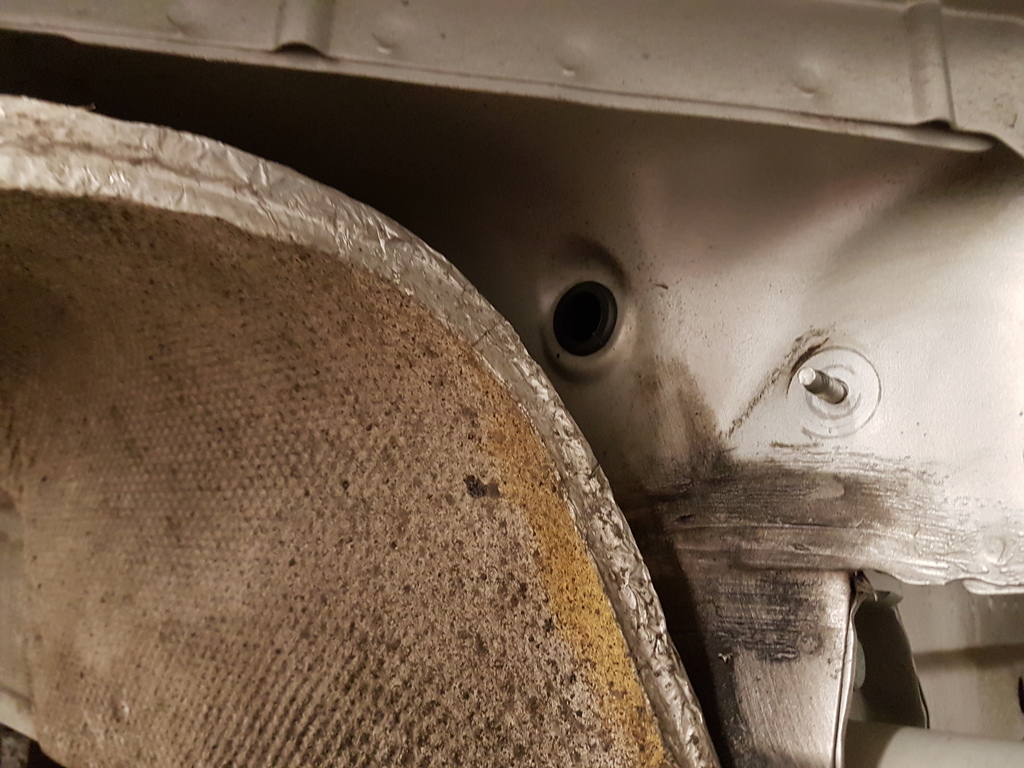
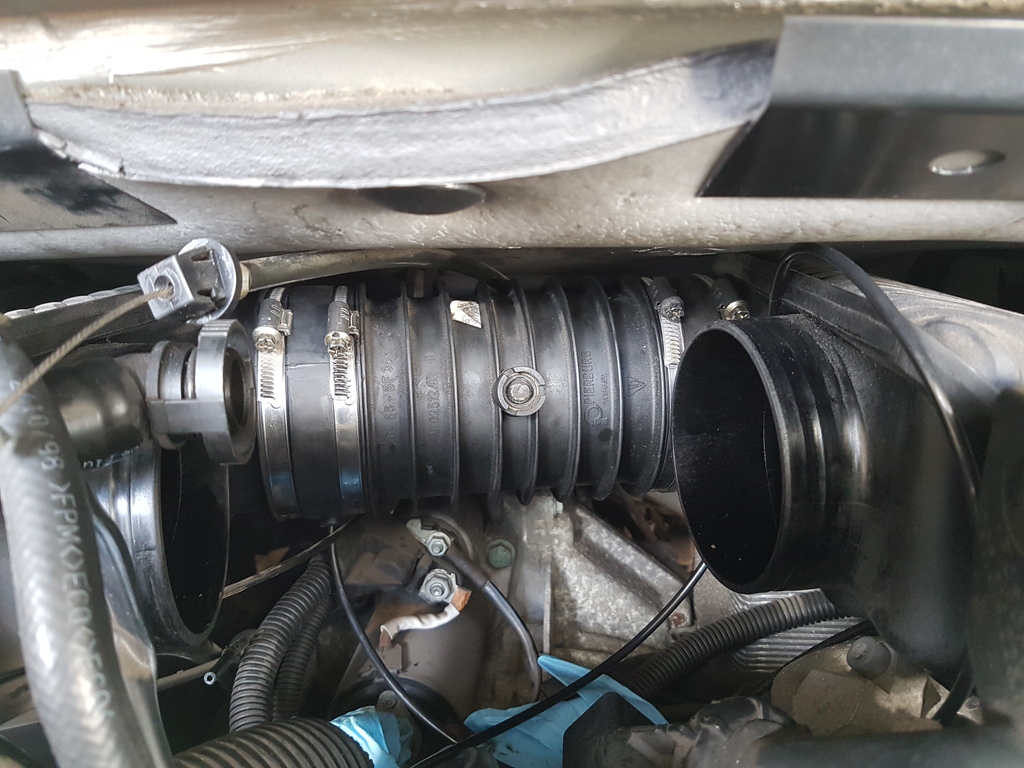
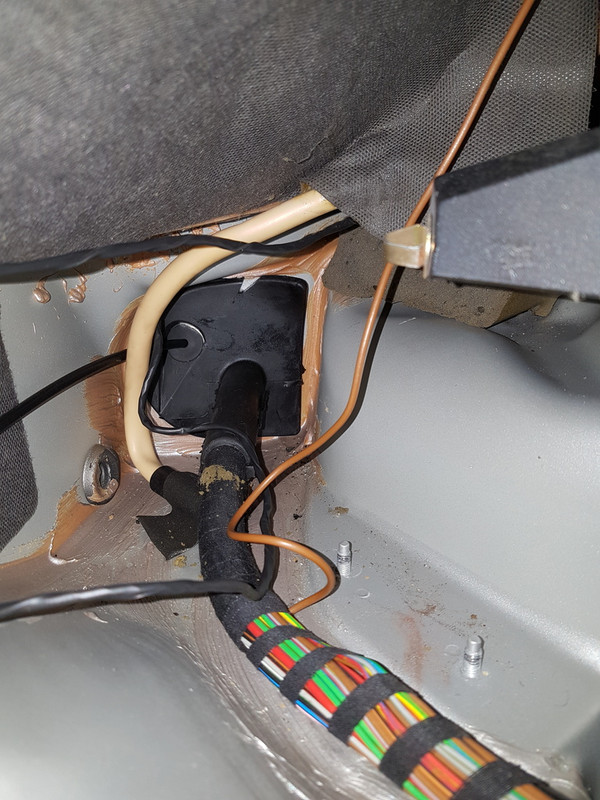
The PSE actuators are controlled by vacuum through a stainless steel covered tube. This tube must run through in to the engine
bay.
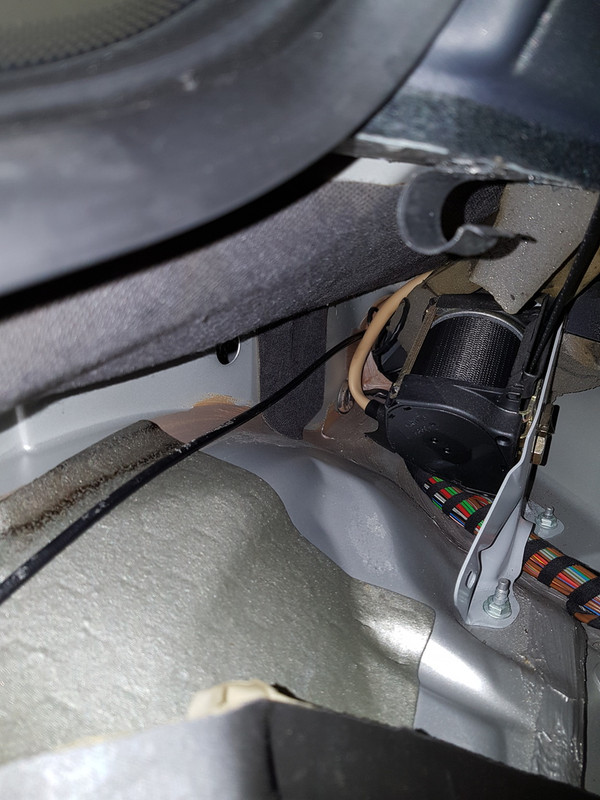
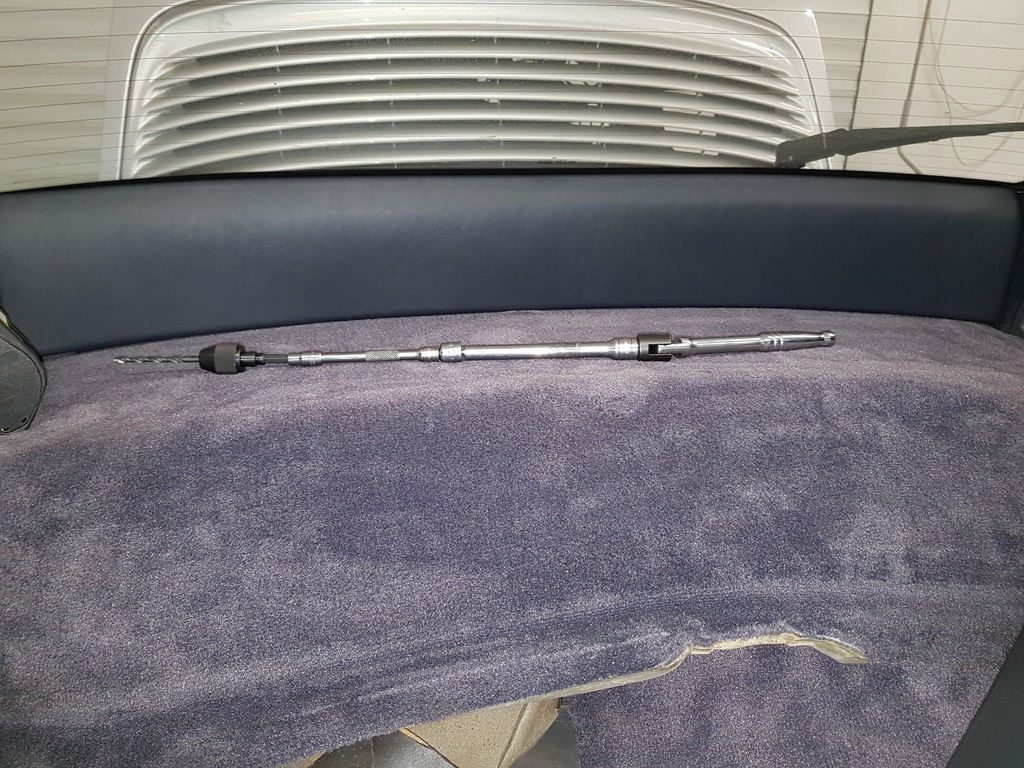
Drill an 8mm hole in the heat shield above the actuator and feed the tube through the hole in the engine bay, fit a 20mm grommet in the hole. The hole is shown in this photo:
The exhaust can now be clamped up and the tips installed. Tips might need adjustment once the rear bumper is in place but that can be achieved by loosening the bolt and moving them.
The heatshields and aluminium bumper can now be fitted. I didn't refit the plastic bumper until the rest of the installation was finished just in case anything needed tweaking.
Next, the vacuum installation.
MC
I searched on the internet to find details of the fitment for this but couldn't find a decent reference so I thought I would write this up for anybody interested. I will split it up in to three parts:
1. Removing the old exhaust and fitting the new one
2. Fitting the vacuum tank / solenoid / vacuum pipes
3. Fitting the switch and relay
The instructions for this are covered in a Porsche TSB, whilst the data is all there, there is little detail so this a more expansive version. It is intended to be read in conjunction with the TSB. If you can't find it online let me know and I'll send you a copy.
Put the key in the ignition in position 1, release the boot and the bonnet and then disconnect the battery by removing the earth lead, place it where it can't accidentally touch the battery. Loosen the rear wheel nuts and then jack the car up.
Remove the rear bumper, at the back of the engine compartment is a strip with 4 screws on it, undo these and take the strip off.
At the front edge of the bumper is a screw at the top and three along the bottom, remove these.
There are another couple of screws underneath the bumper at the back, remove these.
With the help of an assistant, ease the front edge of the bumper out and then pull it backwards. Be careful to remove connectors for the number plate light and parking sensors (if present)
Remove the covers which are over the silencers, these are held on with four nuts along the top and one inside the wheel arch.
The front nuts on the outside edge of mine were corroded on both sides. There isn't much height on the nuts and they rounded off very easily. To remove them I had to resort to using a dremel to cut the sides off the nuts to weaken them and then drive them around with a hammer and chisel. I changed all the nuts and put grease on them when refitting them (photos above are with new nuts)
Remove the aluminium bumper. There is a single bolt each side to remove this, it comes off along with some heat resistant material.
The silencers can now be removed. Undo the clamps at the bottom where the entrance to the silencer attaches to the outlet from the catalyst.
The tips can also be removed at this point.
The silencers are held on with a long bolt at the front and a short bolt at the rear, these run vertically up through a mount. Undo both of these and remove the bolts. The silencers can now be removed from the car.
Here you can see the two silencers with the mounting brackets clearly visible.
The PSE silencers can now be fitted. The brackets on to which the silencers fit have a tube inside them, an 8mm bolt runs through this tube and through the anti-vibration mounts at the top and bottom of the mounts. On my car the tubes were missing front and rear, the long bolt had been replaced by a 10mm bolt and at the rear the short bolts had been kept at 8mm. Due to not having any tubes the bolts had picked up on the anti-vibration mounts and it made one of the rear bolts an abosolute pig to remove. The tubes are available from Porsche, I had bought the long ones for something like £18 each before realising they were nothing more than thinwall tubing. I made the rear ones myself from 1mm wall 10mm OD stainless tubing.
I bought new stainless steel nut, bolts, and washers and then fitted the PSE silencers
The PSE actuators are controlled by vacuum through a stainless steel covered tube. This tube must run through in to the engine
bay.
Drill an 8mm hole in the heat shield above the actuator and feed the tube through the hole in the engine bay, fit a 20mm grommet in the hole. The hole is shown in this photo:
The exhaust can now be clamped up and the tips installed. Tips might need adjustment once the rear bumper is in place but that can be achieved by loosening the bolt and moving them.
The heatshields and aluminium bumper can now be fitted. I didn't refit the plastic bumper until the rest of the installation was finished just in case anything needed tweaking.
Next, the vacuum installation.
MC


 :thumbs: :thumbs:


")


